 English
 Deutsch
 Français
 Русский


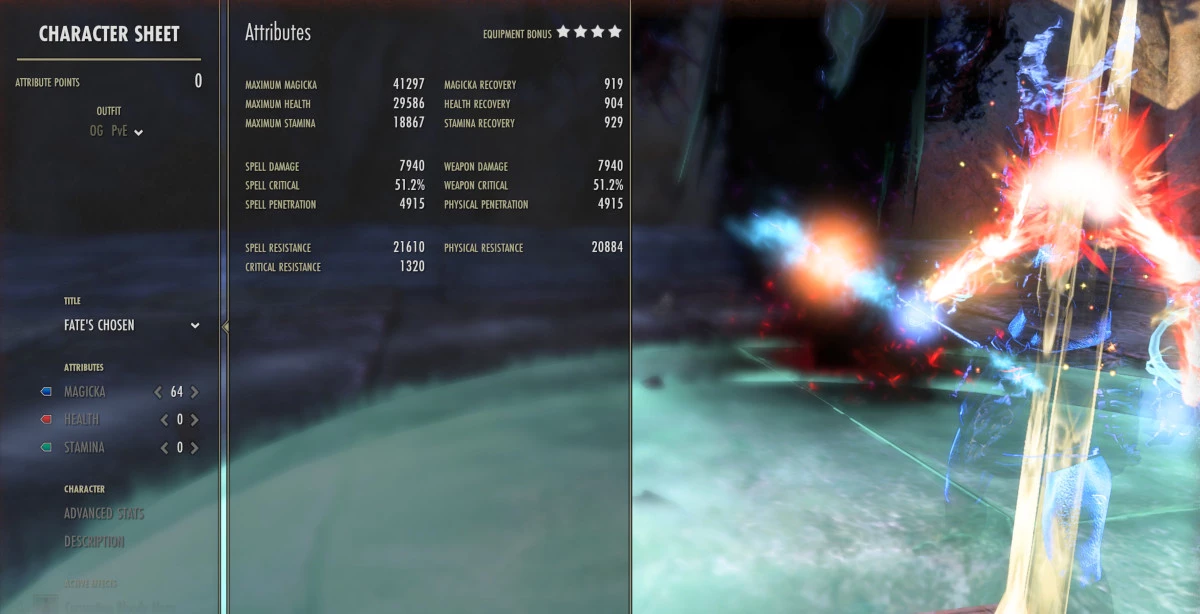
Welcome! Thanks for taking the time to check out this build. I made it for update 40 after my go-to Daedric Tomb skill “broke”. (I can no longer get my second mine to pop on the same target after the 2 second cooldown; the skill expires before a second one ever goes off). So I set out to make a build that is a practical, balanced option for my sorcerer that still hits hard and is effective at clearing out a room so the group can focus on mechanics/bosses. As much as I appreciate the simplicity of the oaken heavy-attack build, it gets extremely boring for me and so I am always gravitating back to my two-bar builds.
There is a lot of flexibility with this build. If you're after more spell penetration you can swap Slimecraw for Kra'gh or Molag Kena for the 124 spell damage. You can also change the trait of your weapons to suit your needs, and you skills also have flex spots where scalding rune can be swapped for crystal fragments or a damage shield/heal depending on how reliable your group healers are and the difficulty of the content you're running. Caltrops can also be swapped for resolving vigor when you have a group member already running it.
I love using Coral Riptide on my sorcerer because it's so easy to manage since she has such a small stamina pool to begin with. The extra resources provided by Death Dealer's comes in handy when you're in vet content where things can get dicey and you need that little bit of extra stamina to handle mechanics. I also really love that the two AOE abilities have the same cooldown as Pillar of Nirn; it really makes all the timers line up nicely and the rotation goes smoothly because of it.
The rotation on this is pretty self-explanatory if you're already familiar with the sorcerer. Going into a fight you'll always start on the back bar to proc Channeled Acceleration and Critical Surge first, then throw down your two ground abilities; Wall of Elements and Caltrops. These have the same timer but I like to do WoE first so when it pops off I know they both need to be reset, plus I think Caltrops has a better animation cancel when switching to your front bar. Once on your front bar you'll proc Hurricane and then Scalding Rune to finish “setting” your buffs and dots. From there the rotation is just heavy attack, Destructive Clench; heavy attack, Destructive Clench until your timers need reset and it's all rinse and repeat from there.