PvE Frost Staff Tank - Warden Build - ESO

I keep using and improving this build for a few years now and I am very happy with how it performs. Of course you shouldn't use it in a Raid but I haven't had any trouble tanking Vet DLC Dungeons with

By cyberkov   •  Updated 2 months ago

Necrom PvE Tank Warden

Introduction

I keep using and improving this build for a few years now and I am very happy with how it performs. Of course you shouldn't use it in a Raid but I haven't had any trouble tanking Vet DLC Dungeons with

Armor Sets

All equipped armor sets
Equipped active Skills

Champion Points

All active and passive stars

Character

All about character setup

Race Options

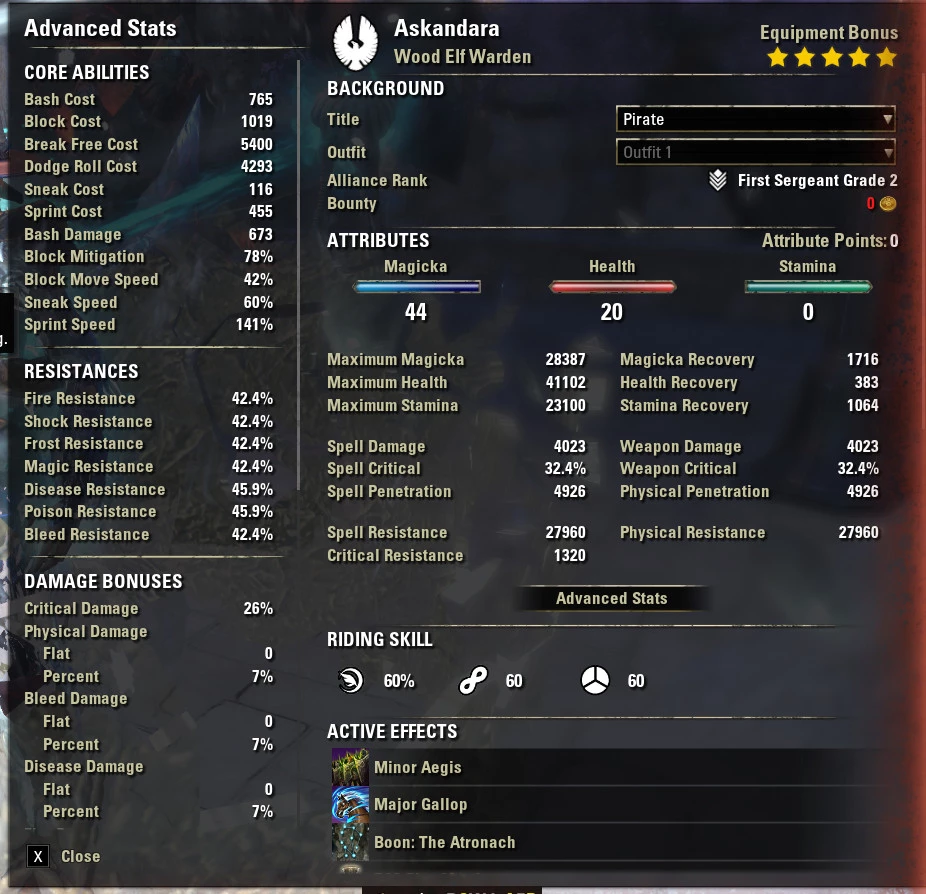
Attributes

  • Icon icon
    Magicka
    44
  • Icon icon
    Health
    20
  • Icon icon
    Stamina
    0

Mundus stone, Curse

Passives

All passive Skills

Buffs & Debuffs

Buffs granted from skills, items & potions
Gallop icon
Gallop
Increases Mounted Speed by 15%
Major Breach icon
Major Breach
Reduces Physical and Spell Resistance by 5948
Major Brutality icon
Major Brutality
Increases Weapon Damage by 20%
Major Maim icon
Major Maim
Reduces damage done by 10%
Major Mending icon
Major Mending
Increases Healing Done by 16%
Major Prophecy icon
Major Prophecy
Increases Spell Critical chance by 12%
Major Protection icon
Major Protection
Reduces damage taken by 10%
Major Resolve icon
Major Resolve
Increases Physical Resistance and Spell Resistance by 5948
Major Savagery icon
Major Savagery
Increases Weapon Critical by 12%
Major Sorcery icon
Major Sorcery
Increases Spell Damage by 20%
Minor Aegis icon
Minor Aegis
Decreases Damage Taken in Dungeons & Trials by 5%
Minor Courage icon
Minor Courage
Increases Weapon Damage and Spell Damage by 215
Minor Lifesteal icon
Minor Lifesteal
Heals 600 Health every second for you and allies who damage the target
Minor Magickasteal icon
Minor Magickasteal
Restores 168 Magicka every second to you and allies who damage the target
Minor Protection icon
Minor Protection
Reduces damage taken by 5%
Minor Toughness icon
Minor Toughness
Increases Maximum Health by 10%

Screenshots

Screenshots by cyberkov
  1. image
    image
1 / 1

Guide

Build Explaination

This build is rather easy to play. You start on the backbar buffing yourself before going in.

Do a heavy attack to get your shields up when there is time, otherwise start taunting right away. 


When dealing with larger groups, use your Gripping Shards to keep them in place.

I've been experimenting with Dark Convergence but I found the proc intervals are too long at the moment. Pulling all the mobs into place with the leash is usually faster.


When your having trouble with your group heal or are separated for any reason, you might want to try out the crimson cuirass oder the leeching plate armor. These help a lot.

cyberkov

cyberkov

Updated 2 months ago