ESO Alchemy Overview Page - All Reagents & Solvents

Complete list of all ESO Alchemy Reagents and Solvents. All mixtures for Potions and Poisons explained for the Alchemy crafting profession in ESO (Elder Scrolls Online).

Alchemy is a Crafting profession in ESO and the process of combining different ingredients to craft powerful potions and poisons, so that your character can use their full potential. Potions and poisons are made from reagents and solvents, where reagents are oftentimes plants, monster remains or other useful items, and solvents are different kinds of waters or oils.

Potion Maker: Test out our ESO Potion Maker - Alchemy Simulator.

Alchemy Reagents

Beetle Scuttle icon
Beetle Scuttle
Breach icon
Breach
Increase Armor icon
Increase Armor
Protection icon
Protection
Vitality icon
Vitality
Blessed Thistle icon
Blessed Thistle
Ravage Health icon
Ravage Health
Restore Stamina icon
Restore Stamina
Increase Weapon Power icon
Increase Weapon Power
Speed icon
Speed
Blue Entoloma icon
Blue Entoloma
Restore Health icon
Restore Health
Ravage Magicka icon
Ravage Magicka
Cowardice icon
Cowardice
Invisible icon
Invisible
Bugloss icon
Bugloss
Restore Health icon
Restore Health
Restore Magicka icon
Restore Magicka
Increase Spell Resist icon
Increase Spell Resist
Cowardice icon
Cowardice
Butterfly Wing icon
Butterfly Wing
Restore Health icon
Restore Health
Uncertainty icon
Uncertainty
Lingering Health icon
Lingering Health
Vitality icon
Vitality
Chaurus Egg icon
Chaurus Egg
Ravage Magicka icon
Ravage Magicka
Restore Stamina icon
Restore Stamina
Detection icon
Detection
Timidity icon
Timidity
Clam Gall icon
Clam Gall
Increase Spell Resist icon
Increase Spell Resist
Hindrance icon
Hindrance
Vulnerability icon
Vulnerability
Defile icon
Defile
Columbine icon
Columbine
Restore Health icon
Restore Health
Restore Magicka icon
Restore Magicka
Restore Stamina icon
Restore Stamina
Unstoppable icon
Unstoppable
Corn Flower icon
Corn Flower
Ravage Health icon
Ravage Health
Restore Magicka icon
Restore Magicka
Increase Spell Power icon
Increase Spell Power
Detection icon
Detection
Crimson Nirnroot icon
Crimson Nirnroot
Restore Health icon
Restore Health
Spell Critical icon
Spell Critical
Gradual Ravage Health icon
Gradual Ravage Health
Timidity icon
Timidity
Dragon Rheum icon
Dragon Rheum
Restore Magicka icon
Restore Magicka
Enervation icon
Enervation
Speed icon
Speed
Heroism icon
Heroism
Dragon's Bile icon
Dragon's Bile
Invisible icon
Invisible
Vulnerability icon
Vulnerability
Vitality icon
Vitality
Heroism icon
Heroism
Dragon's Blood icon
Dragon's Blood
Restore Stamina icon
Restore Stamina
Lingering Health icon
Lingering Health
Defile icon
Defile
Heroism icon
Heroism
Dragonthorn icon
Dragonthorn
Restore Stamina icon
Restore Stamina
Fracture icon
Fracture
Increase Weapon Power icon
Increase Weapon Power
Weapon Critical icon
Weapon Critical
Emetic Russula icon
Emetic Russula
Ravage Health icon
Ravage Health
Ravage Magicka icon
Ravage Magicka
Ravage Stamina icon
Ravage Stamina
Entrapment icon
Entrapment
Fleshfly Larva icon
Fleshfly Larva
Ravage Stamina icon
Ravage Stamina
Vulnerability icon
Vulnerability
Gradual Ravage Health icon
Gradual Ravage Health
Vitality icon
Vitality
Imp Stool icon
Imp Stool
Ravage Stamina icon
Ravage Stamina
Increase Armor icon
Increase Armor
Maim icon
Maim
Enervation icon
Enervation
Lady's Smock icon
Lady's Smock
Restore Magicka icon
Restore Magicka
Breach icon
Breach
Increase Spell Power icon
Increase Spell Power
Spell Critical icon
Spell Critical
Luminous Russula icon
Luminous Russula
Restore Health icon
Restore Health
Ravage Stamina icon
Ravage Stamina
Maim icon
Maim
Hindrance icon
Hindrance
Mountain Flower icon
Mountain Flower
Restore Health icon
Restore Health
Restore Stamina icon
Restore Stamina
Increase Armor icon
Increase Armor
Maim icon
Maim
Mudcrab Chitin icon
Mudcrab Chitin
Increase Spell Resist icon
Increase Spell Resist
Increase Armor icon
Increase Armor
Protection icon
Protection
Defile icon
Defile
Namira's Rot icon
Namira's Rot
Spell Critical icon
Spell Critical
Unstoppable icon
Unstoppable
Invisible icon
Invisible
Speed icon
Speed
Nightshade icon
Nightshade
Ravage Health icon
Ravage Health
Protection icon
Protection
Gradual Ravage Health icon
Gradual Ravage Health
Defile icon
Defile
Nirnroot icon
Nirnroot
Ravage Health icon
Ravage Health
Uncertainty icon
Uncertainty
Enervation icon
Enervation
Invisible icon
Invisible
Powdered Mother of Pearl icon
Powdered Mother of Pearl
Speed icon
Speed
Protection icon
Protection
Lingering Health icon
Lingering Health
Vitality icon
Vitality
Scrib Jelly icon
Scrib Jelly
Ravage Magicka icon
Ravage Magicka
Speed icon
Speed
Vulnerability icon
Vulnerability
Lingering Health icon
Lingering Health
Spider Egg icon
Spider Egg
Invisible icon
Invisible
Hindrance icon
Hindrance
Lingering Health icon
Lingering Health
Defile icon
Defile
Stinkhorn icon
Stinkhorn
Ravage Health icon
Ravage Health
Ravage Stamina icon
Ravage Stamina
Fracture icon
Fracture
Increase Weapon Power icon
Increase Weapon Power
Torchbug Thorax icon
Torchbug Thorax
Fracture icon
Fracture
Enervation icon
Enervation
Detection icon
Detection
Vitality icon
Vitality
Vile Coagulant icon
Vile Coagulant
Ravage Health icon
Ravage Health
Restore Magicka icon
Restore Magicka
Protection icon
Protection
Timidity icon
Timidity
Violet Coprinus icon
Violet Coprinus
Ravage Health icon
Ravage Health
Ravage Magicka icon
Ravage Magicka
Breach icon
Breach
Increase Spell Power icon
Increase Spell Power
Water Hyacinth icon
Water Hyacinth
Restore Health icon
Restore Health
Spell Critical icon
Spell Critical
Weapon Critical icon
Weapon Critical
Entrapment icon
Entrapment
White Cap icon
White Cap
Ravage Magicka icon
Ravage Magicka
Increase Spell Resist icon
Increase Spell Resist
Cowardice icon
Cowardice
Detection icon
Detection
Wormwood icon
Wormwood
Weapon Critical icon
Weapon Critical
Unstoppable icon
Unstoppable
Detection icon
Detection
Hindrance icon
Hindrance
Related guides that might help you

If you need more details on how the whole system works, please visit the Alchemy Crafting Guide.

Depending on the mixture, you can determine the use and the strength, meaning which level you can use it for and how powerful it will be. As an alchemist you gather these materials either by yourself, or by buying them from other players. Generally though you can find the ingredients anywhere, no matter what you do. Oftentimes you don't even need to search for them but will stumble upon them by walking through the world and interacting with things.

Because of the sheer amount of materials needed for ESO Alchemy, the Crafting bag that comes with ESO Plus is highly recommended. It's basically a bottomless and limitless bag, otherwise you will have to manage your inventory very strictly - which can work, but can be time-consuming.

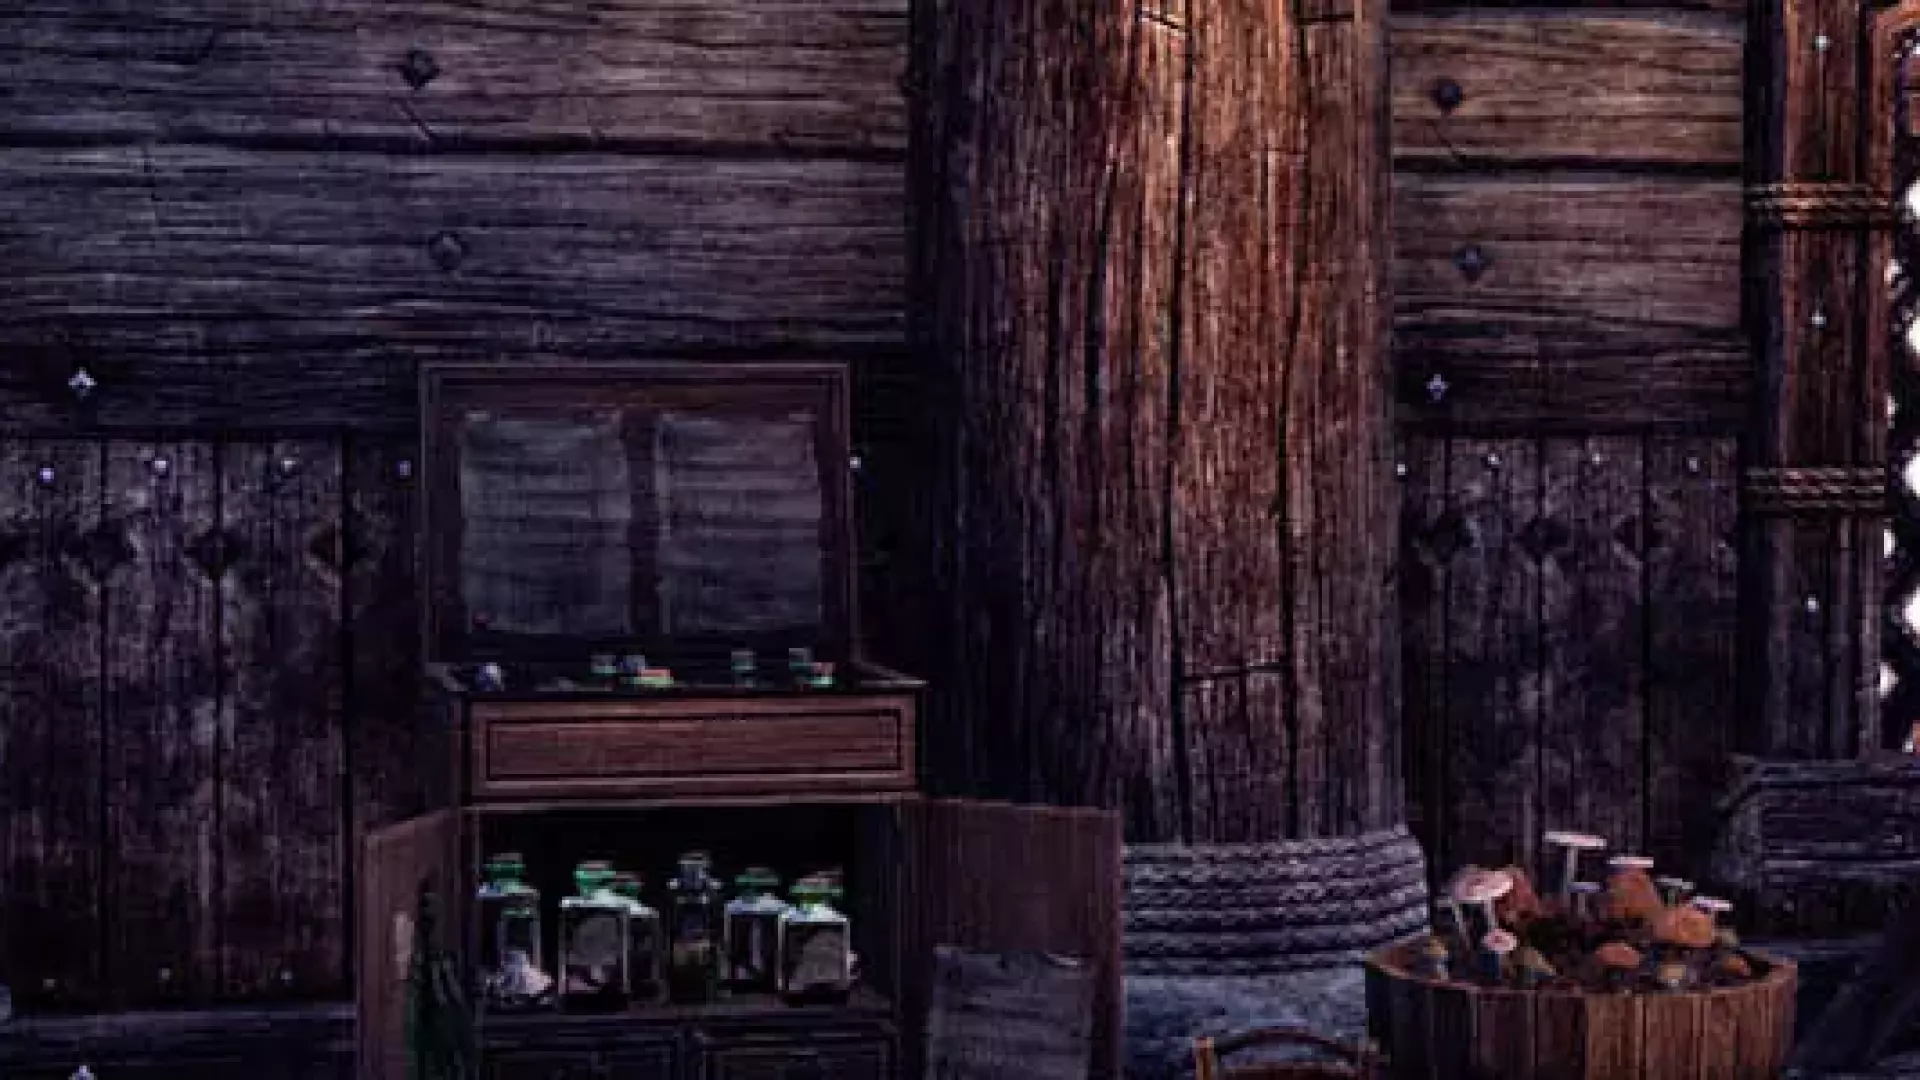
Every reagent has several traits, which can only be analyzed and thus learned. You can analyze a reagent's trait by mixing it with other reagents and solvents. You can also look them up on this page, of course, but you still need to have them identified in the game.

In order to create a potion or a poison you need to add a solvent to a combination of reagents. This way you can add up to 3 buffs or debuffs. You can only do so though if you can add three reagents at once, which is something you need to level on your Alchemy skill line.

In Alchemy you can also create Formulae. These are recipes which you need in order to create anything related to Lighting.  

Alchemy and Alchemists in ESO

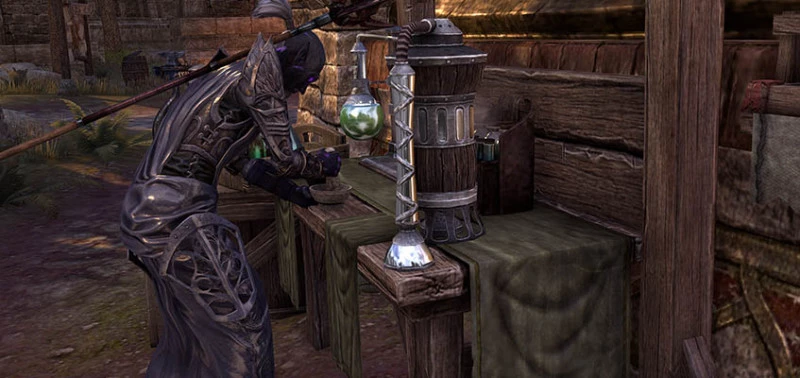
Alchemy in ESO is the process of crafting a potion or a poison, and alchemists gather natural reagents found growing in the world of ESO, and mixes them with solvents at an Alchemy Table to create potions and poisons. Particularly pure water will produce a potion, while various viscous oils can be used to produce poisons. The grade of the solvent will determine the potency of the product. Poisons are at their strongest when concentrated - the more effects that are present on a poison, the less potent each individual effect will become.

If you need more details on how the whole system works, please visit the Alchemy Crafting Guide.

All reagents have hidden traits which determine a product's effects. Similar traits from different reagents must be stacked to bring out their magical qualities. Each trait can be countered by another trait, and if the wrong reagents are mixed together they might cancel each other out. A skilled Alchemist experiments to find reagent combinations that offer the best results.

Poisons that are crafted with positive effects, such as Restore Health, will drain that effect from the target to enhance the poisoner.

Alchemist Table in ESO

ESO Alchemy: Discovering Traits

by Defessus Lector

Bardus,

The method by which an alchemist learns the traits of various reagents is by tasting them. The key word here is "taste"—there is no need to consume more than a single portion of a reagent, even if you find it appealing. And, based on what the sensechal tells me about your visit to your father's wine cellar, you've already determined that common liquors do not possess alchemical traits, even if consumed in quantity.

Tasting a reagent will reveal that ingredient's most obvious alchemical trait—but most have secondary and tertiary magical properties as well. Combining reagents and observing the results will reveal these hidden traits, some of which can be quite astonishing. As you experiment, your skill at alchemy will increase, and it will become easier to recognize these traits and combine them effectively.

You will also begin to notice that certain classes of reagents feature common or even matching traits. For example, the traits of flowers tend to be beneficial, while those of fungus are often detrimental—as you discovered last Morndas when, trying to finish all your homework at the last minute, you consumed nine different kinds of fungus within a few minutes. The resulting projectile regurgitation was most impressive.

Alchemy For My Apprentice

by You Know Who

My dear apprentice, you have destroyed far too many of myalchemicalstocks to go unpunished. My own master would never abide such abject incompetence! "Can't take instruction," she'd say. "Nose in a book," she'd say. Luckily for your prospects, it is far less costly to write this simple manual than replace yet another cask of rare solvent.If you lose this manual, as I know you will, don't despair. I have invested your annual stipend toward printing multiple copies of this book and distributing them far and wide. In time, every alchemy station inTamrielshall have one.

Step One: Acquire Solvents

You already know that every potion requires a solvent to serve as the potion's base. If you ever paid attention to my lessons, you'd know the best solvent is clean water from a natural source. The purity of the water determines the quality of the potion, so the best sources are natural springs.

I must once again emphasize the need for fresh sources of water. Remember that incident with the healing draught? You cannot simply dip a flask into a stagnant pond, an ocean cove, or downstream from a tannery. I suppose you could find bottles of clean water about town, but it is best to do the work yourself.

Incidentally, your "rain barrel solvent" will never work. You are to cease your experiments immediately.

Step Two: Acquire Reagents

Alchemy is a study of combinations. Where solvents are a potion's base, reagents are the active ingredients. Each reagent bears four unique traits. I'm disinclined to explain the principles of quadratic amalgamation to you—again—but do try to remember the basics: match like with like.

Henceforth, you are to find all reagents in the wilds—not in my laboratory! Remember to look for plants and mushrooms. Plants and mushrooms, only! Under no circumstances should you deviate from this. "Squirrel powder" was an abomination against the Eight.

Furthermore, I must remind you to thoroughly clean both mortar and pestle after their use.

Step Three: Craft Potions

Bring a solvent and two reagents to any alchemy station. Different reagents are required, a fact I must stress once again. Combining bugloss with bugloss gets you nothing but foul-tasting water.

When you have what you need, put them together and craft your potion. Reagents with positive trait combinations will produce helpful potions, while those with negative trait combinations can cause harm to whoever is foolish enough to imbibe them. If none of your reagents' traits match, you lose both solvent and reagents.

Experiment with different reagents to see what you can produce. I leave it to you to determine their traits, but will remind you that ingesting a reagent can teach you its most basic trait. Just one—don't gorge yourself!

While I recall of it, did you expect I wouldn't know you'd finished off the nirnroot? I could hear your teeth singing, and there's no way to hide a glowing chamber pot.

Advanced Alchemical Principles

Only when you master the basics of alchemy should you think to complicate the process. Through careful study you can learn to suppress negative traits when crafting potions, craft multiple potions from the simple set of reagents, or even combine additional reagents to produce more powerful potions!

But for now, "not poisoning yourself" is the goal I'd most like you to achieve.

Frequently Asked Questions

Common questions from other players
Is there alchemy in ESO?
Yes, ESO had Alchemy since the very beginning. You can craft powerful potions and poisons with these that help you achieve great tasks in the game and are extremely useful for endgame content and PVP.
Is Alchemy good in ESO?
Alchemy is an extremely powerful craft in ESO and oftentimes determines whether you survive a fight or not when it comes to endgame content or PvP. It also helps extremely with resources and is definitely a must later in the game.
How do you unlock Alchemy in ESO?
You unlock Alchemy in ESO by walking up to the Crafting table. This way you can unlock all craftings in ESO. If you want to know more about Alchemy, check out this guide!
How does Alchemy work in ESO?
Alchemy in ESO works by adding reagents to solvents, meaning you add, for example, flowers to special water, which will in turn result in a potion. If you want to know more you can check out this guide!