Combat - ESO

Abilities
You can find your Ability Bar at the bottom center of the screen when you enter combat or when you target a hostile. You can drag and drop combat abilities into this tray from the Skills menu and execute an ability by pressing the corresponding 1 2 3 4, or 5 number keys.|ac
The Ability Bar
Battle Leveling Boost
Battle leveling helps lower level characters play competitively with higher level characters, providing an even playing field for Adventuring, Dungeons, and Alliance Warfare.Battle leveling boosts Max Health, Stamina, Magicka, Armor & Spell Resistance, Spell Damage, Weapon Damage, Critical Strike Chance, and Recovery. This boost decreases as the character increases level, eventually vanishing once the character reaches the maximum Champion Point level.
Status Effects
Dealing damage has a chance to apply additional effects to the target based on the damage done.Magical Damage Types:
• Flame Damage applies Burning. Deals damage over 4 seconds.
• Frost Damage applies Chill. Deals instant damage. Applies Minor Maim for 4 seconds, reducing damage done. While an Ice Staff is actively equipped, applies Minor Brittle for 4 seconds, increasing the critical damage taken.
• Shock Damage applies Concussed. Deals instant damage, increasing if Concussed was already applied. Applies Minor Vulnerability for 4 seconds, increasing damage taken.
• Magic Damage applies Overcharged. Deals instant damage and restores Magicka. Applies Minor Magickasteal for 4 seconds, causing attackers to restore Magicka.
Martial Damage Types:
• Bleed Damage applies Hemorrhaging. Deals damage over 4 seconds, stacking up to 3 times.
• Disease Damage applies Diseased. Deals instant damage, splashing to nearby enemies up to once every 4 seconds. Applies Minor Defile for 4 seconds, decreasing healing taken and damage shield strength.
• Physical Damage applies Sundered. Deals instant damage and increases your Weapon and Spell Damage. Applies Minor Breach for 4 seconds, reducing Armor.
• Poison Damage applies Poisoned. Deals damage over 4 seconds, increasing based on missing Health.Status Effects have the following chances to apply from these attacks:
• Weapon Enchantments: 20%
• Single Target Direct Damage: 10%
• Area of Effect Direct Damage: 5%
• Single Target Damage over Time: 3%
• Area of Effect Damage over Time: 1%
• Light and Heavy Attacks: 0%
Disabling Effects
Disabling Effects prevent a target from performing common actions such as moving, attacking, or using skills. The most important to note:• Stunned: cannot move, attack, or take action
Knowing how to inflict Disabling Effects on enemy targets and end Disabling Effects early on your character is vital to becoming an experienced player. Consult your character's Skills and morphs to learn how your class best causes and resists Disabling Effects.
Other Disabling Effects include:• Charmed: cannot attack or take action while moving toward the charm source
• Disoriented: stunned, but any direct damage taken ends the effect early
• Feared: cannot attack or take action
• Immobile: cannot move, but can attack or take action
• Knocked Back: stunned and pushed from the knockback source
• Knocked Down: stunned and knocked to the ground
• Off-Balance: Heavy Attacks inflict added damage, restore bonus resources, and cause the stunned effect
• Pulled: Stunned and dragged toward the Pull source
• Silenced: cannot use Magicka-based skills
Removing Negative Effects
Certain positive effects can disrupt Disabling Effects, Elemental Status Effects, and negative Status Effects from a target.• Cleanse: Removes all negative effects from the target. The Templar Skill Purify and the Alliance War Support skill Purge are examples of this.
• Immovability: The target is immune to all Disabling Effects. The Heavy Armor skill Immovable is an example of this.The action Break Free provides Immovability in exchange for Stamina. Refer to Help > Combat > Break Free for more details.
Basic Attacks
Attack enemies with any weapon to perform a Basic Attack.• Light Attacks are fast, inflict small amounts of damage, and cost no Magicka or Stamina to perform. Target an enemy and tap |k200.0%:114|k to perform a Light Attack.
• Heavy Attacks are much slower, but they inflict large amounts of damage. Heavy Attacks also restore Magicka (when wielding a staff) or Stamina (when wielding melee weapons or a bow). Press and hold |k200.0%:114|kuntil you perform a Heavy Attack.
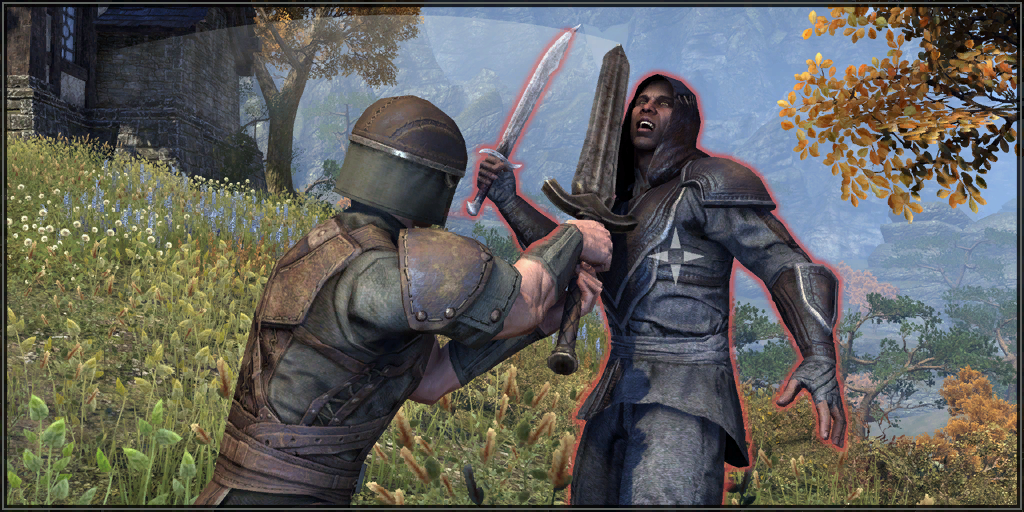
Blocking
To put your character in a defensive posture to Block an incoming attack, press and hold |k200.0%:115|k. This act is referred to as Bracing. A successful Block will mitigate an attack's damage, but it will also exhaust your Stamina. You can make your Block more effective at mitigating enemy attacks, as well as lessening its Stamina cost, with special bonuses from abilities and items.When an enemy is radiating gold, it is readying itself to make a powerful attack. If this attack is successfully Blocked, the enemy will be knocked back, momentarily stunned, and set Off-Balance, giving you the advantage on your next attack.Bracing will also make you immune to most stuns, knock backs, and pull effects while active, but will not make you immune to snares, immobilizes, silences, Off-Balance, or fears.
Blocking Heavy Attacks will also halve the amount of resources your opponent would recover from the attack.
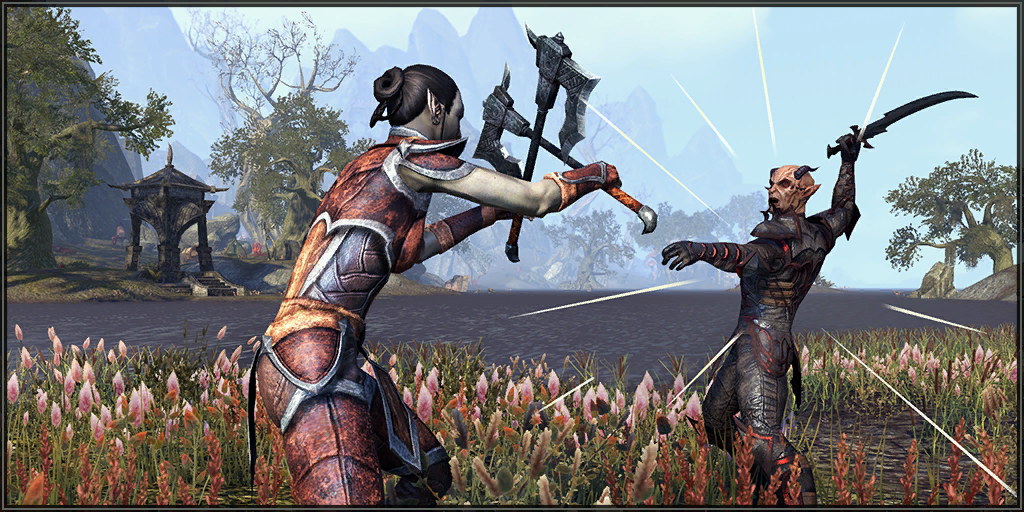
Break Free
Some enemies will use abilities that incapacitate your character, which are known as Disabling Effects. You can escape many of these effects by pressing |k200.0%:119|k to perform Break Free. Break Free is generally effective at removing stuns, fears, and charms, but it will not remove snares, immobilizes, silences, or forced position changes.Break Free consumes a large amount of Stamina from your character. After activating Break Free, you will gain Crowd Control Immunity for a short duration, which makes you immune to most stuns, fears, charms, knockbacks, knockdowns, and pulls. You can reduce the cost of Break Free and increase the duration of Crowd Control Immunity with special bonuses from abilities and items.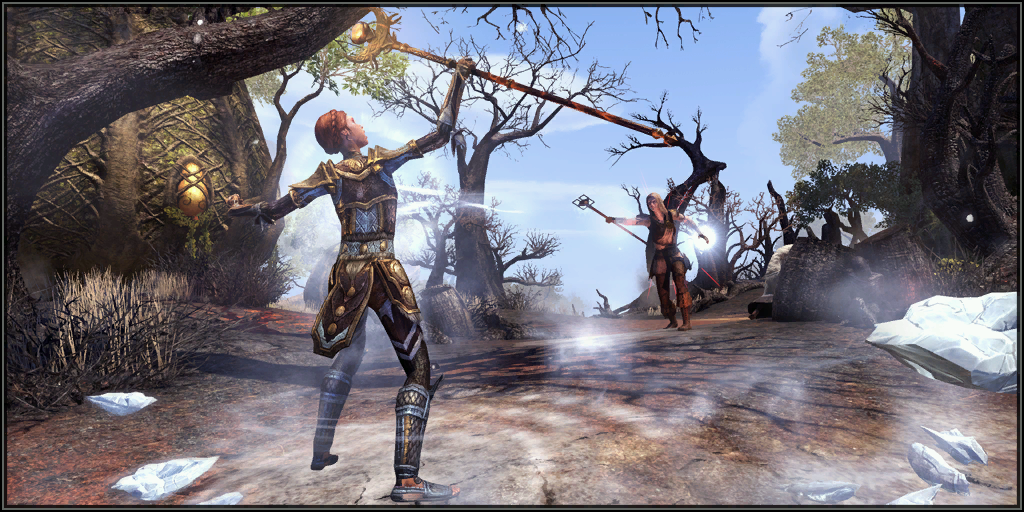
Dueling
You can invite another player to dual in any non-PVP overland zone using the social interaction wheel. A single Duel involves exactly two players, but there may be multiple unrelated duels occurring simultaneously in the same area. If an area has too many players dueling simultaneously, a duel must end before a new one can begin.During a duel, outside influences from other players, such as healing and buffs, will be blocked, and Battle-spirit will be applied to both dueling players.Dueling players must stay within a marked dueling radius. Monster combat will not end a duel, but exiting the dueling radius will result in a forfeit.
If you don't want to be invited to duels, you can auto-decline invitations by going to the Social menu in your Settings panel and toggling "Auto-Decline Duels" to "On."
Dodging
Your character can dodge roll out of the path of incoming attacks by double-tapping any one of the W A S or D keys to execute a Dodge Roll in the corresponding direction. Dodge Rolls expend Stamina and becomes more costly with successive uses. You can reduce the cost of Dodge Roll with special bonuses from abilities and items.Dodge Rolling also allows you to escape from many effects that immobilize you, and makes you immune to most immobilizations for a short duration after activating.Dodge Rolling will allow you to avoid incoming attacks and damage. Dodge Roll is most effective against direct damaging attacks, but generally cannot be used to avoid damage over time attacks.
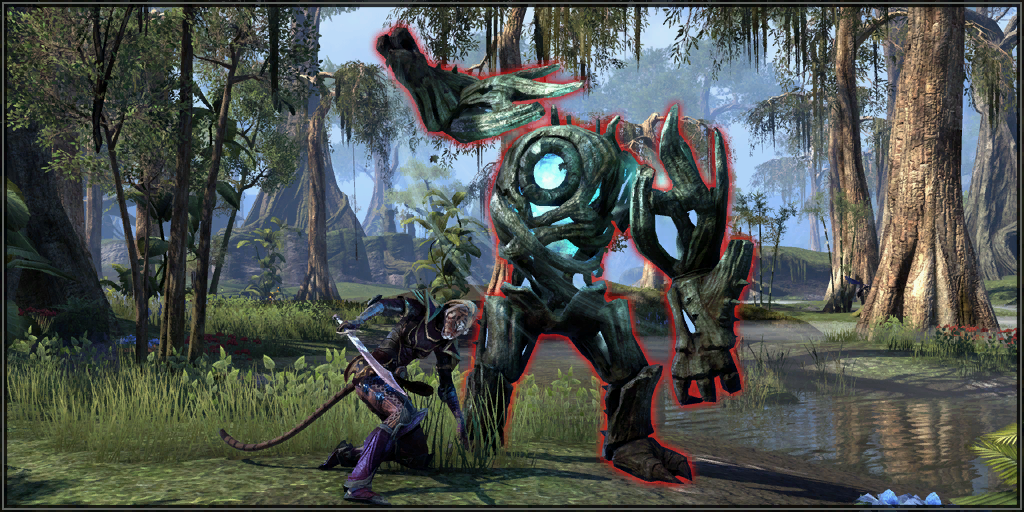
Off Balance
Some abilities and effects have the added benefit of setting your target Off Balance, such as interrupting a wind-up attack, blocking a powerful attack, or using certain abilities or items that denote this behavior. This is a special Disabling Effect that renders a target vulnerable to additional effects from certain actions and attacks.Enemies that are Off Balance can be hit with Heavy Attacks to cause additional effects. Heavy Attacks against Off Balance enemies will restore additional resources, deal significantly more damage, and will attempt to stun them.Off Balance will always persist for the same duration, regardless of its source, and cannot be removed before its duration has passed. After the Off Balance effect ends, the target will become immune to Off Balance for a duration.
Identifying Foes
While you are adventuring in Tamriel, you will encounter many hostile foes that must be defeated in combat. When a potential foe is targeted while in game, its silhouette will be outlined in red if it is hostile, or in yellow if it is neutral, but attackable.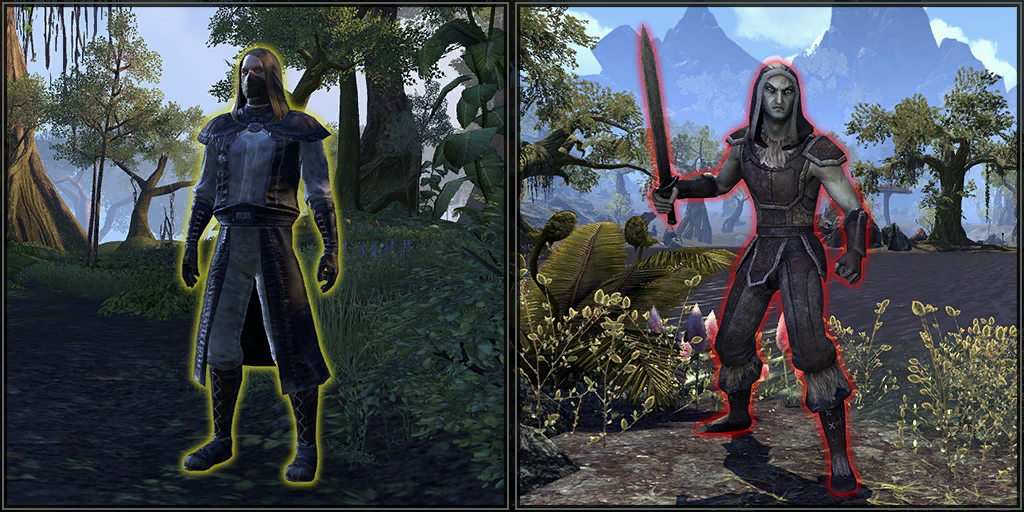
Interrupts
Interrupts cut short an enemy's wind-up when they prepare to execute a special ability that requires a wind-up. When an enemy is preparing such a wind-up, red lines will radiate from it. To interrupt the wind-up, approach the target and press |k200.0%:119|k. Some additional abilities may also attempt to interrupt targets, as denoted in the ability's tool tip if applicable.Successfully interrupting a wind-up action will cancel the cast and leave the target Off-Balance and stunned, leaving them vulnerable to a follow-up attack. Players who are interrupted during a wind-up will have that specific ability locked from activating for a brief moment, but players who are under the effects of Crowd Control Immunity cannot have wind-up actions interrupted by other players.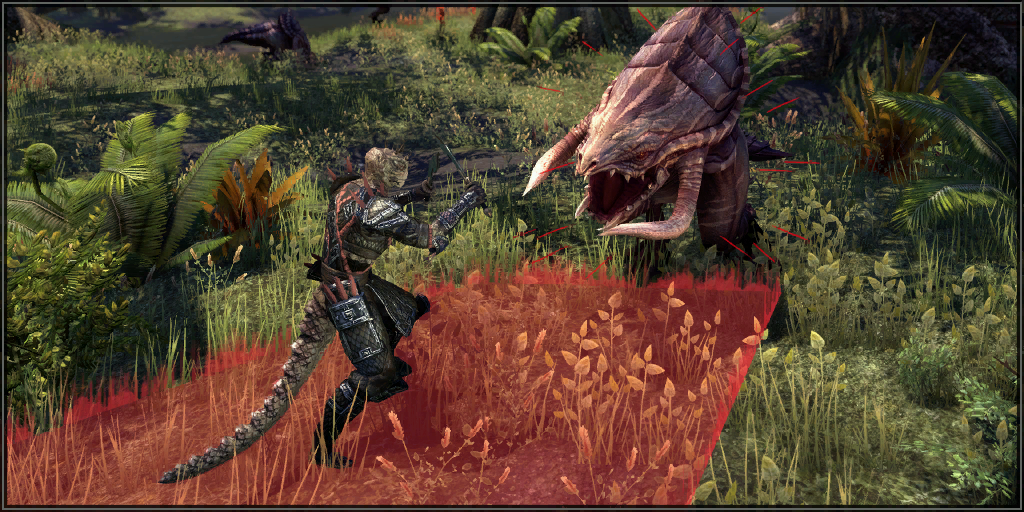
Magicka and Stamina
Using abilities will expend either Magicka or Stamina. The amount of Magicka and Stamina you currently have is represented by the bars respectively, located at the bottom of the screen. These bars will only be visible while Magicka and Stamina are being expended.|acFull
Expending
Depleted
Monster Difficulty
Difficult monsters you encounter have unique Health bars. The more lavish the Health bar, the harder the monster. Harder monsters have more health, deal more damage, and can even be immune to certain effects (such as crowd control).|acNormal
Scary
Hard
Deadly
Health Bar Visual Effects
Some effects can boost or reduce the effectiveness of enemies, allies, and yourself. The resource bars of anyone targeted by these effects will change in appearance:|acDamage Shield
Decreased Armor
Increased Armor
Increased Power
Invulnerable
Healing Negation
Damage and Healing Categories
Damage and Healing actions can be broken down into categories to denote special guidelines and behaviors of their effects. The categories of these actions are generally referred to with the following naming conventions:Duration types
• Direct effects: actions that deal their effects immediately when used
• Over time effects: actions that deal their effects multiple times during a duration period
Area of influence types
• Single target effect: actions that affect a single target or are applied to individual targets that have been affected by a single action
• Area of effect: actions that affect multiple targets within a certain areaMost actions are referred to with a combination of both a duration type and an area of influence type, such as single target direct effect or area of effect over time.
Some actions may also consist of multiple components that have differing categories, such as a direct area of effect action that also applies single target effects over time. An example of this is Fiery Breath, which deals area of effect direct damage and applies single target damage over time to enemies.
Named Buffs
As you battle enemies or other players, you will experience buffs (positive effects that benefit you in combat). These effects do not stack and will replace itself with the longest duration effect of its kind when applied. The complete list of common buffs in The Elder Scrolls Online is as follows:Buffs• Resolve: Increases your Physical and Spell Resistance by a small amount (Minor) or a large amount (Major).
• Protection: Reduces your damage taken by 5% (Minor) or 10% (Major).
• Aegis: Reduces your damage taken from trial, group dungeon, and arena enemies by 5% (Minor) or 10% (Major).
• Berserk: Increases your damage done by 5% (Minor) or 10% (Major).
• Slayer: Increases your damage done in trial, group dungeons, and arenas by 5% (Minor) or 10% (Major).
• Empower: Increases your Heavy Attack damage against monsters by 70%.
• Brutality: Increases your Weapon Damage by 10% (Minor) or 20% (Major).
• Sorcery: Increases your Spell Damage by 10% (Minor) or 20% (Major).
• Force: Increases your Critical Damage done by 10% (Minor) or 20% (Major).
• Savagery: Increases your Weapon Critical rating by approximately 6% (Minor) or 12% (Major).
• Prophecy: Increases your Spell Critical rating by approximately 6% (Minor) or 12% (Major).
• Mending: Increases your healing done by 8% (Minor) or 16% (Major).
• Vitality: Increases your healing received and damage shield strength by 6% (Minor) or 12% (Major).
• Fortitude: Increases your Health Recovery by 15% (Minor) or 30% (Major).
• Intellect: Increases your Magicka Recovery by 15% (Minor) or 30% (Major).
• Endurance: Increases your Stamina Recovery by 15% (Minor) or 30% (Major).
• Heroism: While in combat, grants you 1 Ultimate (Minor) or 3 Ultimate (Major) every 1.5 seconds.
• Minor Toughness: Increases your Max Health by 10%.
• Evasion: Reduces your damage taken from area of effect attacks by 10% (Minor) or 20% (Major).
• Expedition: Increases your Movement Speed by 15% (Minor) or 30% (Major).
• Gallop: Increases your Mount Speed by 15%.
• Courage: Increases your Weapon and Spell Damage by a small amount (Minor) or a large amount (Major).
Named Debuffs
As you battle enemies or other players, you will experience debuffs (negative effects that inhibit you in combat). These effects do not stack and will replace itself with the longest duration effect of its kind when applied. The complete list of common debuffs in The Elder Scrolls Online is as follows:Debuffs
• Breach: Reduces your Physical and Spell Resistance by a small amount (Minor) or a large amount (Major).
• Vulnerability: Increases your damage taken by 5% (Minor) or 10% (Major).
• Maim: Reduces your damage done by 5% (Minor) or 10% (Major).
• Minor Enervation: Reduces your Critical Damage done by 10%.
• Minor Uncertainty: Reduces your Weapon and Spell Critical rating by approximately 6%.
• Defile: Reduces your healing received and damage shield strength by 6% (Minor) or 12% (Major).
• Minor Lifesteal: Enemies that attack you are healed.
• Minor Magickasteal: Enemies that attack you restore Magicka.
• Minor Timidity: While in combat, consumes 1 Ultimate every 1.5 seconds.
• Cowardice: Reduces your Weapon and Spell Damage by a small amount (Minor) or a large amount (Major).
• Minor Mangle: Reduces your Max Health by 10%.
• Brittle: Increases Critical Damage you take by 10% (Minor) or 20% (Major).
Ultimate Abilities
Ultimate Abilities are devastatingly powerful abilities that charge up over time during combat. You can learn an Ultimate Ability and slot one in the sixth slot of your Ability Bar. When an Ultimate Ability is slotted and fully charged you can execute it by pressing the R key.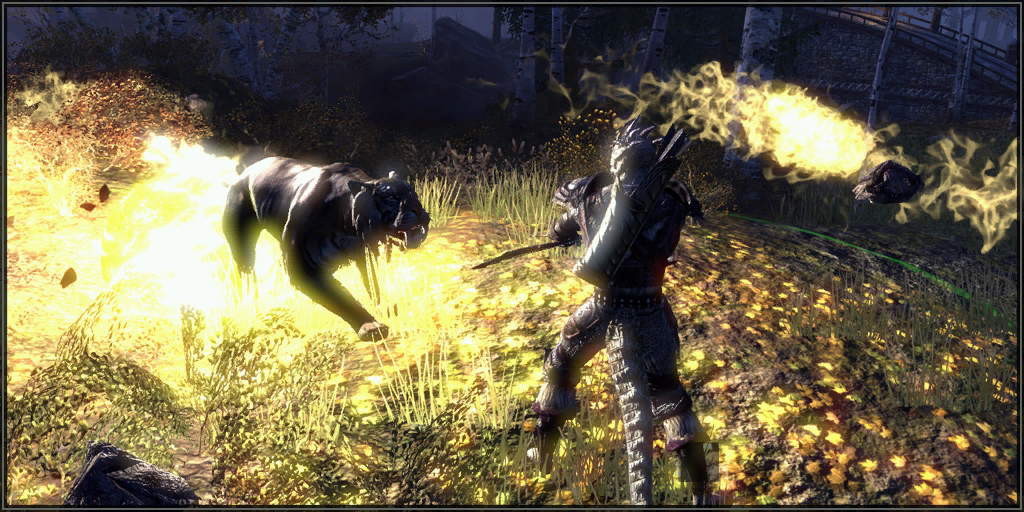
Weapon Swap
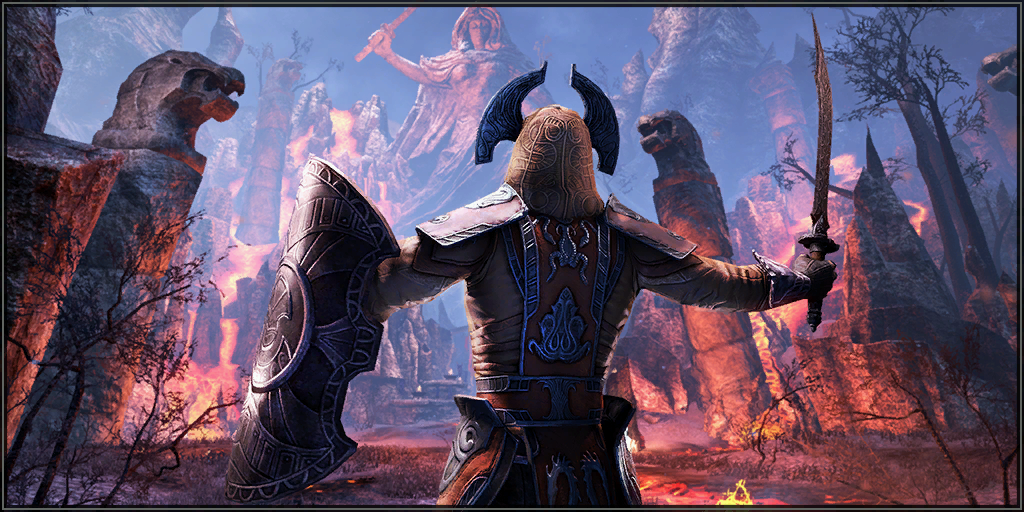
Upon reaching level 15 players can equip two weapons, each with their own hotbar.Press ö to perform the Weapon Swap.
This can be particularly useful when switching between multiple combat roles such as damage dealer, tank, healer, or buff support.
Mundus Stones
You can find Mundus Stones throughout Tamriel. When you interact with one, you gain a Mundus Boon, which is a persistent buff. You can have only one Mundus Boon at a time, but can change it at any time by visiting another Mundus Stone.The Lady: Increases Physical and Spell Resistance
Found In: Auridon, Glenumbra, Stonefalls, Cyrodiil The Lover: Increases Physical and Spell Penetration
Found In: Auridon, Glenumbra, Stonefalls, Cyrodiil
The Tower: Increases Maximum Stamina
Found In: Grahtwood, Stormhaven, Deshaan, Cyrodiil
The Lord: Increases Maximum Health
Found In: Grahtwood, Stormhaven, Deshaan
The Mage: Increases Maximum Magicka
Found In: Grahtwood, Stormhaven, Deshaan, Cyrodiil
The Shadow: Increases Critical Damage and Critical Healing
Found In: Greenshade, Rivenspire, Shadowfen, Cyrodiil
The Atronach: Increases Magicka Recovery
Found In: Greenshade, Rivenspire, Shadowfen, Cyrodiil
The Serpent: Increases Stamina Recovery
Found In: Greenshade, Rivenspire, Shadowfen, Cyrodiil
The Warrior: Increases Weapon Damage
Found In: Malabal Tor, Alik'r Desert, Eastmarch, Cyrodiil
The Ritual: Increases Healing Effectiveness
Found In: Malabal Tor, Alik'r Desert, Eastmarch, Cyrodiil
The Thief: Increases Critical Strike chance
Found In: Malabal Tor, Alik'r Desert, Eastmarch, Cyrodiil
The Steed: Increases Run Speed and Health Recovery
Found In: Reaper's March, Bangkorai, The Rift, Cyrodiil
The Apprentice: Increases Spell Damage
Found In: Reaper's March, Bangkorai, The Rift, Cyrodiil
Target Markers
You may apply one of eight different target markers to any target. Either select a target using the TABULATOR button or highlight a target in your targeting reticule. Hold the TABULATOR button and a circle of target markers will appear on screen. Select a marker in the same way you would a Quickslot item, and the target will be highlighted with your chosen marker.Selecting a new target with that mark will remove it from the previous target. Applying the same marker to a target a second time will clear that marker. Rather than using the wheel, you can assign keybindings to each of the markers instead, under the Targeting section of the Keybindings menu.
Markers can be applied to both enemies and allies, and are only visible to members of your group. Any player in a group can assign, reassign, or remove any target marker at any time. Markers can be applied to your character by choosing a marker without picking a target. When a group member has a target marker on them, you can also see the marker in the group menu display at the top left of the screen.
Markers on non-player enemies are automatically removed when the enemy dies. Markers on players remain until removed or until the group moves to a new zone.
Subclassing
Customize your gameplay experience by Subclassing! Subclassing allows you to equip class skill lines from other classes. When you reach level 50 with a character you become eligible to accept the quest "A Study in Discipline." Completing this quest enables use of the Subclassing system on that character.This quest can be granted in the following ways:
• Find and speak to the adventurer Bahtra at-Hunding, located near the wayshrines at Riften in The Rift, Evermore in Bangkorai, and Dune in Reaper's March.
• Grant yourself the quest starter via the Crown Store.
• Grant yourself the quest directly from the Subclassing UI within the Skills menu.
To equip a skill line you'll need to subclass a skill line from another class or master that skill line by achieving rank 50 on that skill line's primary class.
You must always have one skill line from your primary class equipped. You can equip two subclassed or mastered skill lines to your build, but only one subclassed or mastered skill line per class.
Subclassing allows full use of Active, Passive, and Ultimate skills from other classes. Subclassed or mastered skill lines level up at a slower rate than your primary class skill lines. Skills from subclassed or mastered skill lines only become available as certain character levels are reached. Each skill from subclassed or mastered class skill lines also costs two skill points to unlock, instead of one.Subclassing Skill Lines
You may choose skill lines to subclass by selecting the Respec Skills button in the Skills menu, at a Rededication Shrine, or by talking to Bahtra at-Hunding. You must subclass a skill line until you reach rank 50 in that skill line.
Subclass selections are on a per-character basis, and you may only subclass three skill lines at a time. Your subclass skill line progress towards rank 50 is shared account-wide. Primary class skill lines do not share this progress.
When you reach rank 50 with a subclass skill line, that subclass is considered mastered. You will unlock the skill rank 50 achievement and upgrade collectible for that skill line. You may then choose to subclass a different skill line on that character and begin rank progression anew.
Equipping Skill Lines
At any time primary class skill lines, mastered skill lines, and your chosen subclassed skill lines may be equipped or unequipped via a Rededication Shrine, using the Respec Skills button in the Skills menu, or by talking to Bahtra at-Hunding in her camp.
When you unequip a skill line you will be refunded any spent skill points. Overall rank progress in a skill line will be retained, however you will have to reallocate skill points when you choose to re-equip that skill line.
Class Mastery
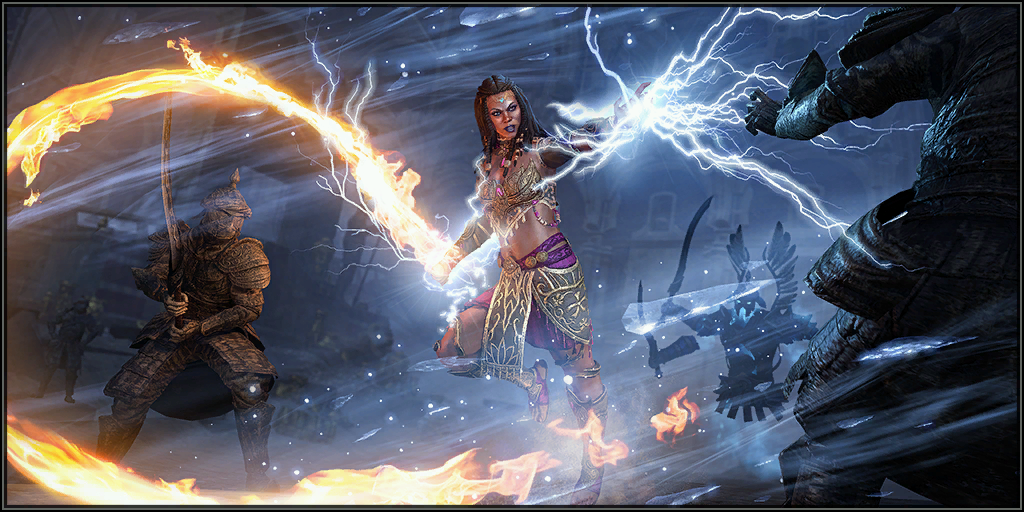
Power up your primary class with Class Mastery! Class Mastery skills are powerful passive-only benefits unlocked by reaching level 50 in all three skill lines of your primary class. While Subclassing can offer variety and infinite customizability, Class Mastery lines reward you for focusing on the power fantasy of your primary class. There's no wrong way to play!To review your Class Mastery skill line access the Skills menu by pressing the K key. You can find your Class Mastery skill line underneath your third skill line in the primary class set.
You are granted two Class Mastery Points to spend on any of the five passive options of your choosing. Each Class Mastery passive skill is designed to highlight a core component of your class. By mixing and matching these options you can explore endless variety within the power fantasy of your chosen class.
Class Mastery Points can be refunded via respec on the Skills menu, in the same manner as any other Skill Point. Class Mastery Points may not be used to purchase non-Class Mastery skills.
To make use of your Class Mastery skills you may not have a skill line from another class equipped to your build. If you equip a skill line from another class to your build after choosing Class Mastery skills, your Class Mastery skills will be disabled and your Class Mastery Points will be refunded. You will be unable to choose Class Mastery skills again until only your three primary class skill lines are equipped.
Skill Scroll
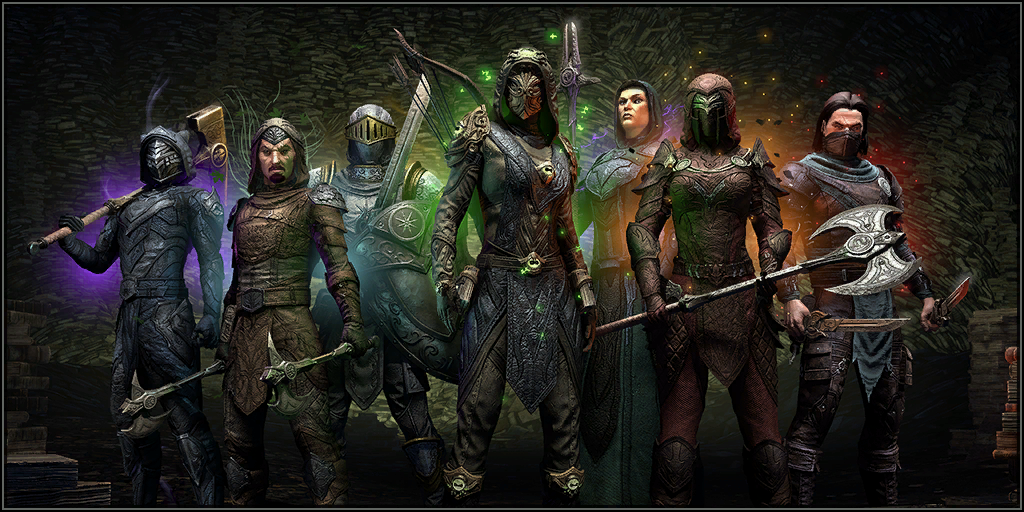
Skill Scrolls are single-use items which allow you use Abilities from across the game without requiring a specific Class or Weapon Skill Line.They can be equipped in a quickslot and are consumed upon use. Skill Scrolls cannot be used from the inventory menu.
Abilities cast by a scroll work just like the abilities in your build. They are focused on dealing damage, providing a buff or debuff, healing, or a combination of these effects.
Unlike potions, Skill Scrolls can be targeted at yourself, allies, or enemy targets. Information on what a particular Skill Scroll provides can be found in the item's description text.
Skill Scrolls cannot be used while your hotbar is overridden, such as when using Volendrung or in Werewolf Form.
Challenge Difficulty
Challenge Difficulty is a character modifier which impacts your damage done and the amount of damage monsters do to you. It also offers scaling rewards for participating. You earn more gold and experience as you scale up difficulty settings.Challenge Difficulty settings impact monsters in the open world, in public dungeons, in delves, and in story instances. Challenge Difficulty settings do not impact dungeons, arenas, trials, pvp zones, the Infinite Archive, or the Night Market. Challenge Difficulty is a personal setting and does not impact party members or other players attacking your target in any way.
Challenge Difficulty may be changed at any time, when not in combat, by going to your character menu. Press C and choose an option from the interface in the upper left portion of the screen. During level up, Challenge Difficulty may be changed by choosing the difficulty icon in the upper right corner of the level up rewards window.
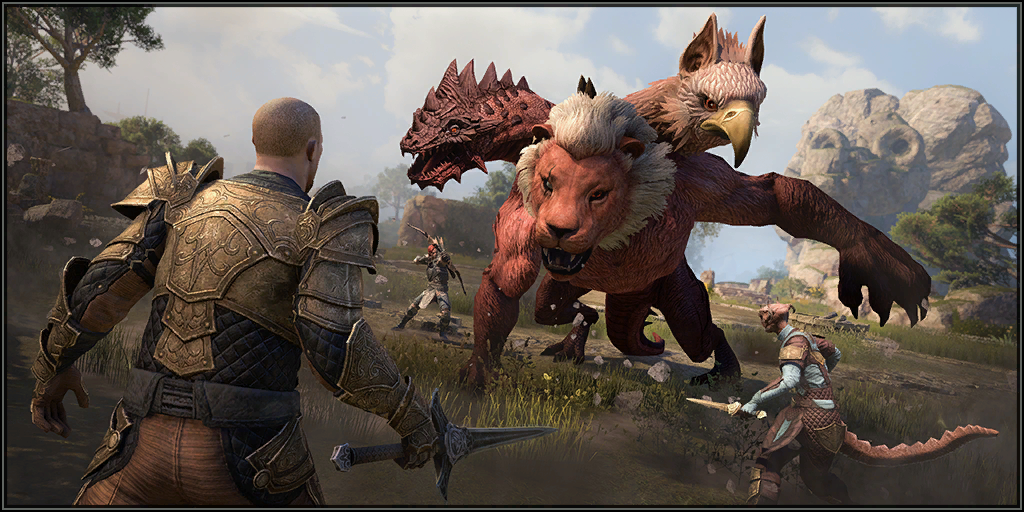
There are four Challenge Difficulty setting levels. Characters default to Adventurer difficulty on creation.
Challenge Difficulty Settings
Adventurer - Your adversaries await you, as they always have. Default difficulty in line with previous Elder Scrolls Online open world challenges.You take normal damage and do normal damage. You receive normal gold and experience rewards for defeating monsters.
Seasoned - Your adversaries have grown in power and formidable threats await you on the battlefields of Nirn. Adapt your skills and spells, and you will carry the day.
You take 100% more damage from monsters and do 20% less damage. You receive 50% more gold and 20% more experience from monsters.
Master - Word of your prowess has reached your adversaries and they have responded in kind. They are ready to destroy you. Gather your allies, perfect your build, and have a few potions handy next time you sally forth into battle.
You take 300% more damage from monsters and do 50% less damage. You receive 100% more gold and 75% more experience from monsters.
Vestige - Lingering echoes of the Planemeld deepen shadows across Tamriel. Your adversaries will hunt you mercilessly. Give no quarter, for almost certain death awaits you.
You take 600% more damage from monsters and will deal 80% less damage. You receive 200% more gold and 100% more experience from monsters.
Help articles
68 articles
-

-

-

-

-

-

-

-

-

-

-

-

-

-

-

-

-

-

-

-

-

-

-

-

-

-

-

-

-

-

-

-

-

-

-

-

-

-

-

-

-

-

-

-

-

-

-

-

-

-

-

-

-

-

-

-

-

-

-

-

-

-

-

-

-

-

-

-

 Deutsch
 Français
 Русский
 Español


