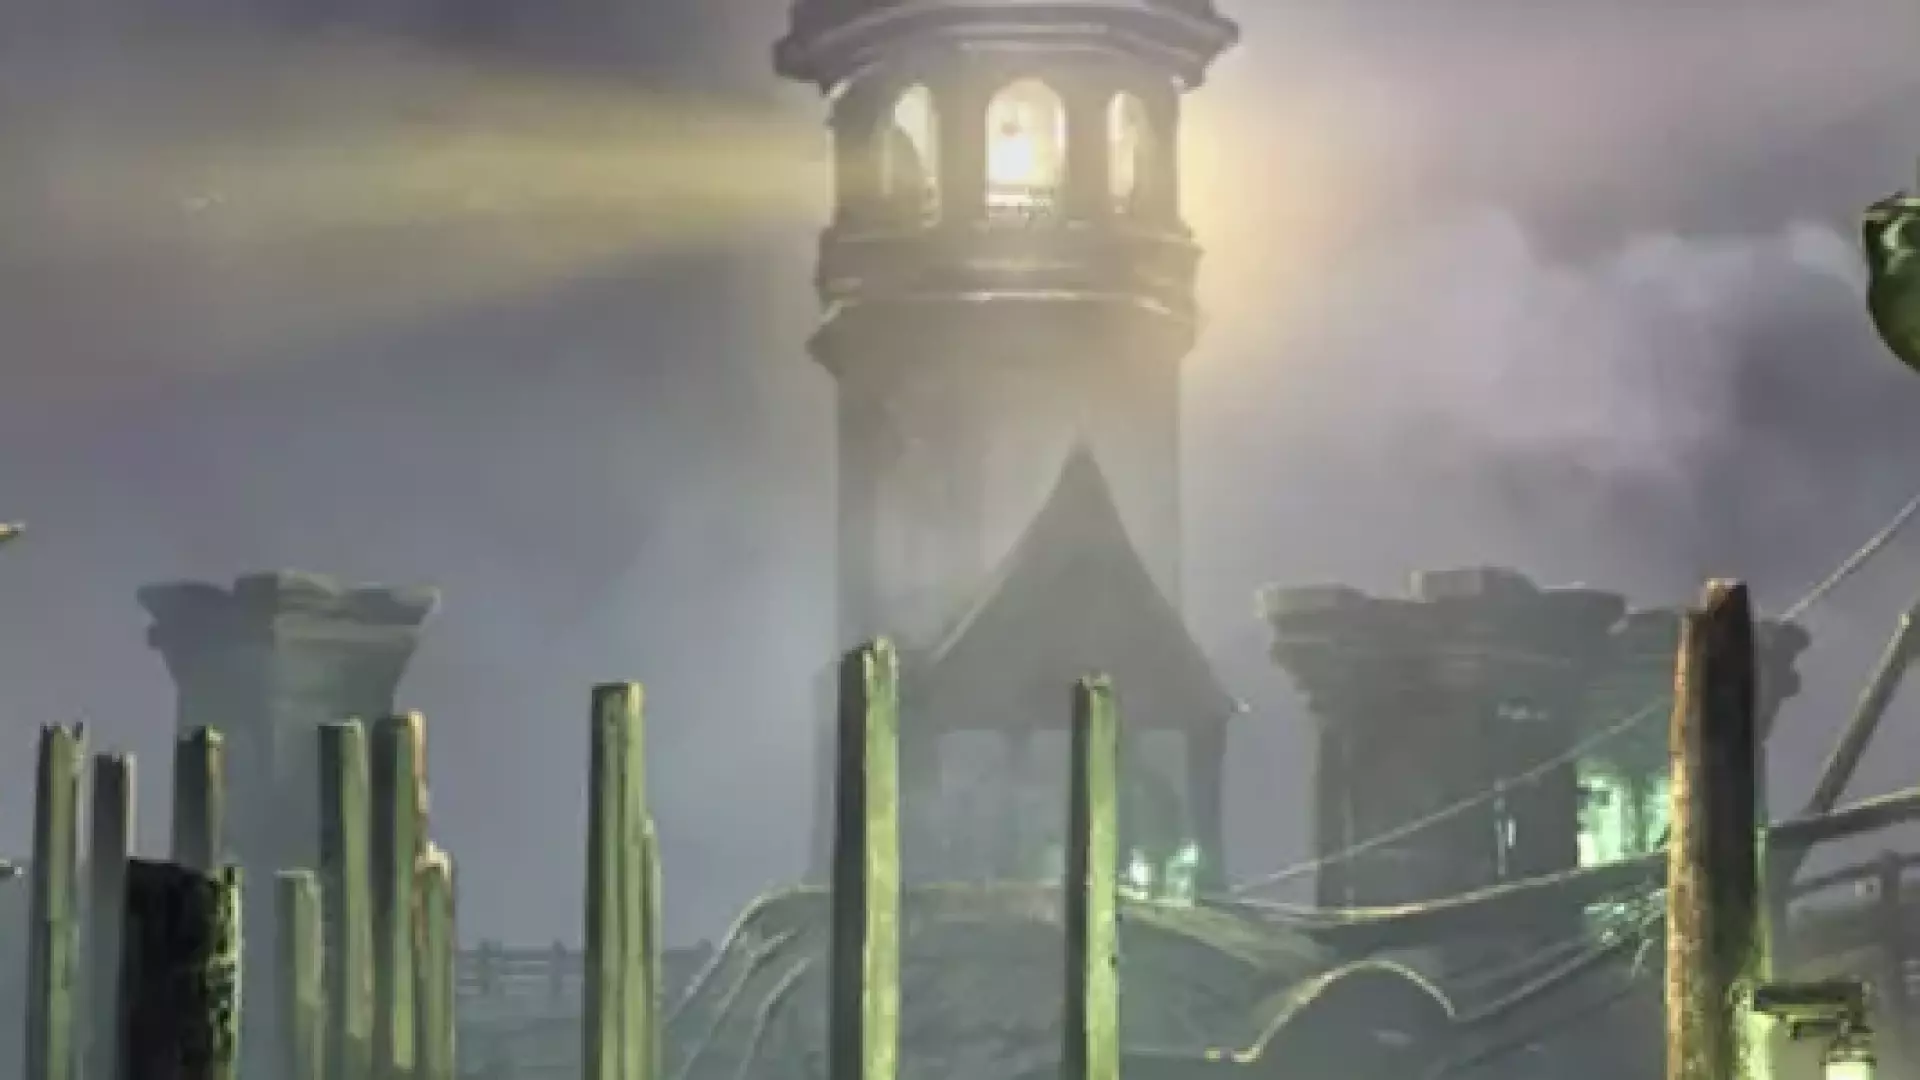
Welcome to the Red Petal Bastion Dungeon Guide for ESO (Elder Scrolls Online). The Red Petal Bastiion dungeo guide is made for both normal and veteran mode. The Red Petal Bastion dungeon is located in Glenumbra, in the Daggerfall Covenant, one of the major factions in the Elder Scrolls Online. Red Petal Bastion was added to the game with Update 3 1, the Waking Flame DLC. Players can either use the Group & Activity Finder in order to enter the dungeon as a 4 player group, or select it from the northeast Glenumbra map.
The dungeon has 6 bosses in total. 3 main bosses and 3 secret bosses.
If you have more questions, you can also ask someone in our community partner discord about this Red Petal Bastion Dungeon Guide!
Set & Rewards
Below you can find the new sets and rewards that will drop in the Red Petal Bastion dungeon.
Sets
There are four new sets that can drop in the Red Petal Bastion dungeon, one light, one medium, one heavy and a new Monster Set.
- Thunder Caller (Light)
- Grisly Gourmet (Medium)
- Silver Rose Vigil (Heavy)
- Prior Thierric (Monster Set)
Achievements
For achievements please look at the bottom of this guide. They are listed there in detail.
Rewards
Like with most dungeons, Red Petal Bastion also brings along some rewards once you complete either veteran or normal mode challenges.
Body Marking: Shattered Chivalry Body Tattoo for Red Petal Bastion Conqueror (Veteran) and Head Marking: Shattered Chivalry Face Tattoo for Arcane Analyst.

For defeating the last boss on Hardmode, you will earn the title "Seeker of Artifacts" from Prior Offenses.
Title: of the Silver Rose for Bastion Breaker.
You will also be able to get a new dye called Moonshadow Orchid for this achievement Waking Flame Delver.

You can earn the [Scorpion Pyreling] non combat pet for completing the Waking Flame Explorer achievement.
Now you know everything about the Red Petal Bastion dungeon sets and rewards. Lets take a look at the dungeon mechanics next.
Trashmonsters
There are a few trashmonsters in the Red Petal Bastion dungeon, below you can find a quick summary of what you should expect.
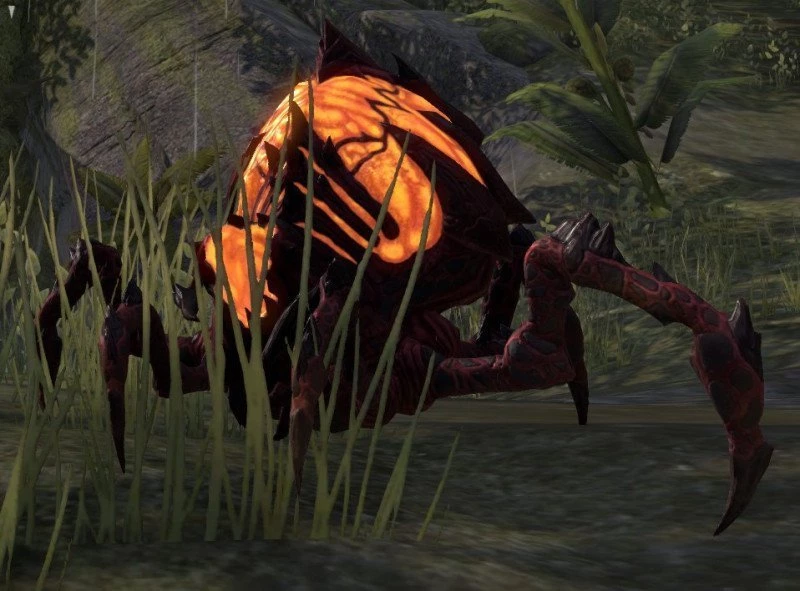
- Silver Rose Archer, Silver Rose Pyromancer, Silver Rose Warrior, War Wolf: These are pretty much generic trashmobs in the Red Petal Bastion dungeon, each with their own, specific abilities. The tank should chain in the Archers and Pyromancers, in order to keep them all under control.
- Silver Rose Realmshaper: The Realmshaper should be tanked immediately and turned away from the group.
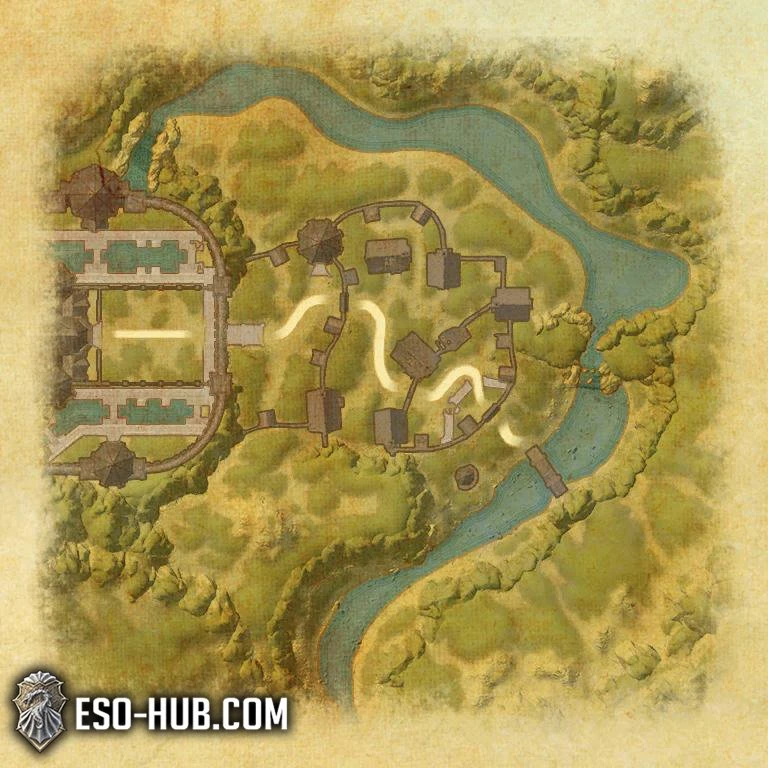
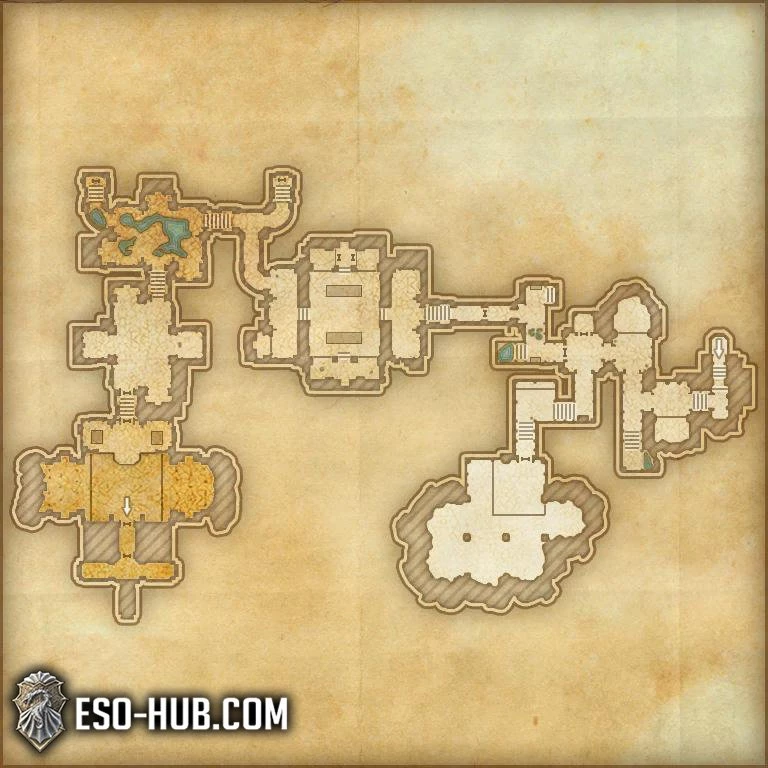
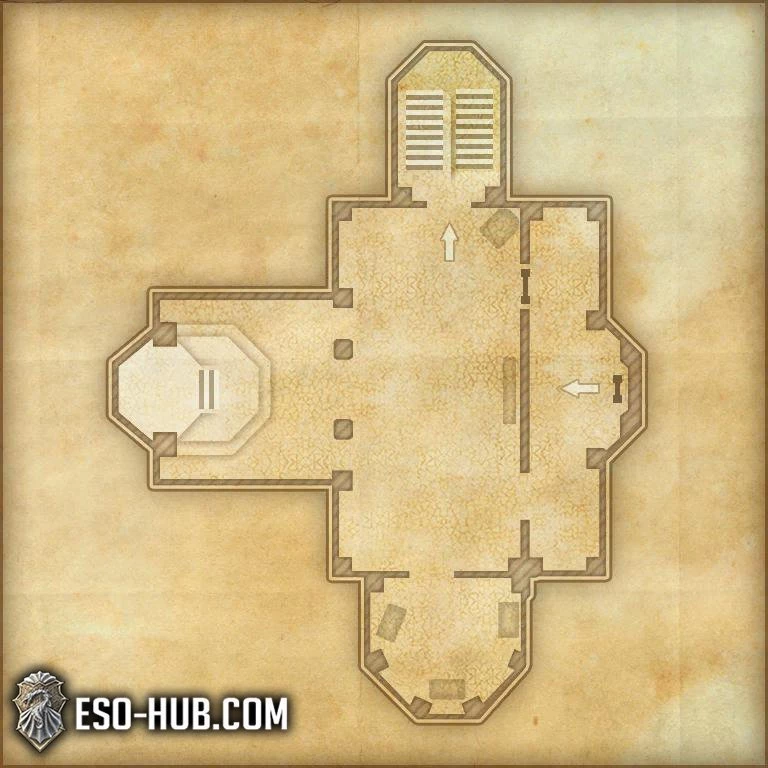
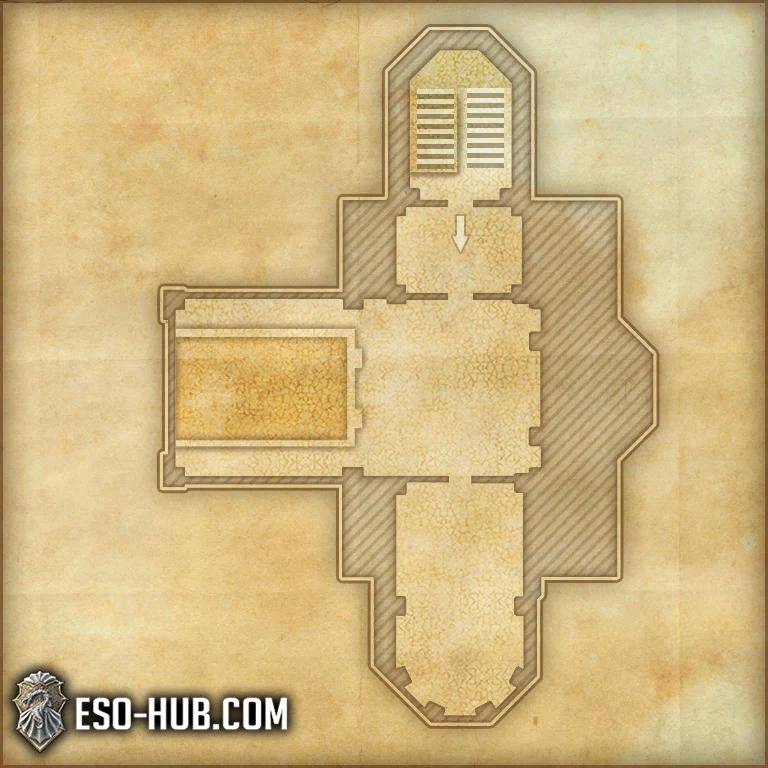
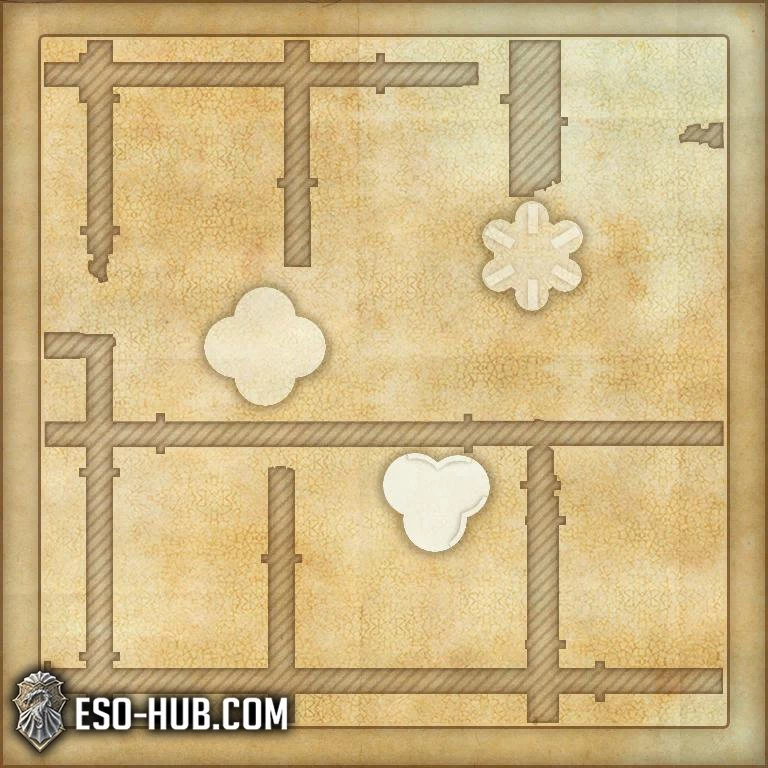
Dungeon Maps
Below you can find the map images of the Red Petal Bastion dungeon in ESO (Elder Scrolls Online).
Bosses Overview
In this section of the Red Petal Bastion Guide for ESO we are going to take a look at the health of bosses that you encounter. There are a total of 6 bosses in this dungeon, 3 that are mandatory and 3 are optional secret bosses. Killing the optional secret bosses will actually boost your stats, please visit the Secret Bosses section of the guide.
The values below are for the veteran version of Red Petal Bastion dungeon.
| Boss | Health | Adds |
| Rogerain the Sly | 3,182,733/12,789,390 | Gate of Chaos (Death Hopper, Chaos Spider, Watcher) |
| Eliam Merick, Ihudir and Liramindrel | 4,092,086/14,075,098 | - |
| Prior Thierric Sarazen | 4,318,304/17,049,630 | Realmshaper, Relic Fiend |
| Secret Bosses | ||
| Spider Daedra (Anya) | 2,679,408 | Pre-fight adds |
| Grievous Twilight (Nagaia) | 2,679,408 | Pre-fight adds |
| Wraith of Crows (Agea) | 2,679,408 | Pre-fight adds |
Bosses
In this section of the Red Petal Bastion guide for ESO we are going to take a look at the primary 3 bosses of the dungeon. Rogerain the Sly, Eliam Merric with his two friends Ihudir and Liramindrel and the endboss Prior Thierric Sarazen.
Rogerain the Sly
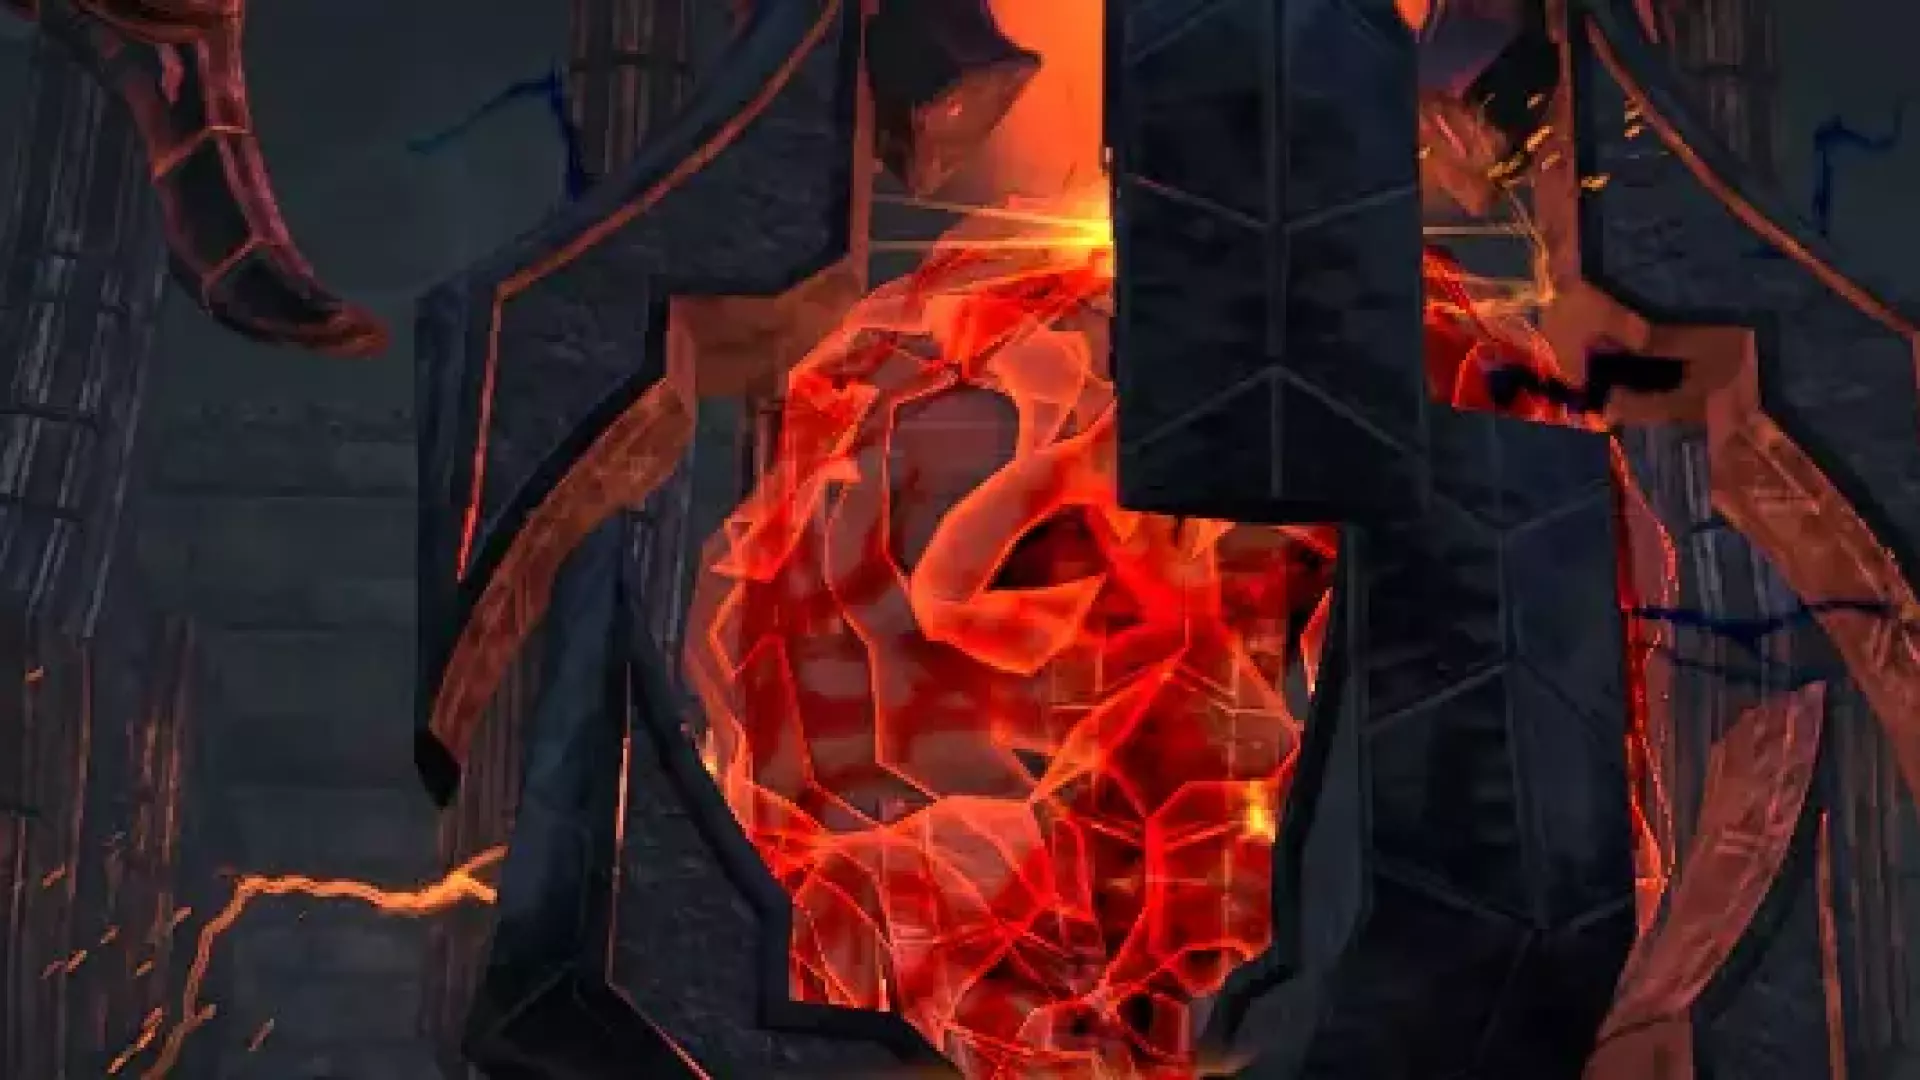
Rogerain the SlyRogerain the Sly is the first boss in Red Petal Bastion dungeon and he seems to be a tadbit on the crazy side. You will notice pretty soon into the fight that this will just remain an observation, but is the essence of this fight. Rogerain seems to have been dabbling with the powers of the mad God, Sheogorath and has some nice surprises waiting for you!Heavy Attack: Charging up his attack by whirling around his staff, Rogerain will release his staff on the ground, calling forth electrified tornadoes that will deal a moderate amount of damage and stun everyone that gets touched by them.Unspeakable Void:Casting what looks much like a negation field, the boss will summon a huge circle on a player with void fog coming from the ground. You should get out immediately, as this deals a ton of damage.Belly Buster:Coming from the very center of the Unspeakable Void, this ability will have erupt 8 smaller AoE circles that will deal quite a lot of damage. Try to avoid them by stepping out of their way.Chaos Rains:Sometimes, the boss will let poison fall on the group. This deals a large amount of damage and needs to be healed.Chaos Gate:From time to time, the boss will cast a Chaos Gate. From this gate a few enemies can escape randomly. The Chaos Spider will cast webs on the ground underneath a player, slowing them down significantly, the Death Hopper will release a Fetid Spit on the group, causing a moderate amount of poison damage on each player, and the Watcher will stun the player with an eyebeam. The one player that will be turned into a goat (see below) can charge the gate and place a dot on it that allows the other players to greatly increase their damage on the portal.Goatification:In very short intervals, the boss will turn a random player into a goat. This goat can basically do two things: eat Sweetrolls and charge the Chaos Gate. If the player decides to eat the Sweetrolls, every time they do it they will add a buff to themselves and heal the group. The buff has this effect: "Greatly increase damage done to Gates of Annihilation portals. Restores a small portion of Stamina and Magicka instantly. Increase damage and healing done by 5%. Increase move speed by 5%."
Hardmode Mechanics
Eliam Merick, Ihudir and Liramindrel
Eliam Merick, Ihudir and LiramindrelThe second boss in the Red Petal Bastion dungeon in eSO, Eliam Merric is made up of one main boss with two adds (Ihudir and Liramindrel) that create the entire boss. Eliam guards the inner sanctum of the Red Petal Bastion and you can't progress further with the group through the dungeon, if you haven't killed this boss.Aftershock:This boss can cast an electrically charged field on the floor which takes up most of the room. Move out of it as quickly as possible, as it does a large amount of damage if you continue standing in it and will kill you.Stonesplitter Plunge:The one standing the furthest away will be charged with a jump and knocked backwards. Best strategy here is to stand relatively close to the boss, so that he doesn't start charging.Blowback:The boss will try to overwhelm the tank by lifting his leg and releasing a stun attack. This must be blocked, but will push you back regardless.Rockslide Rush: The boss will also start charging up an attack which rams the tank. This can either be dodge rolled or blocked.At around 80% boss health, Liramindrel, the archer, will jump into the fight. She has a few typical archer attacks. She will also charge arrows into the air which fall down on the ground and leave traps which will stun any player stepping inside of them. You can only temporarily disable her, but she won't be dead for long.At around 50% boss health, Ihudir will join the fight. He is a melee with a two-handed sword and will deal quite a lot of damage. He has an ability that needs to be instantly interrupted, otherwise it deals a ton of damage.At around 30% boss health, both will come back into the fight and fight you at the same time. If you have enough DPS, it's quite possible to ignore them and focus on the boss, but it's the safest to kill them again before concentrating on the boss again, as they can be quite annoying with their abilities.
Hardmode Mechanics
Prior Thierric Sarazen
Prior Thierric SarazenPrior Thierric Sarazen is the endboss of the Red Petal Bastion dungeon in ESO (Elder Scrolls Online). He does not only have a ton of health, but also a lot of mechanics that need to be played right, otherwise you can die to many things.Heinous Highkick & Wide Slice: The boss will charge up a kick, which you can block or dodge roll. If you don't, this attack will stun you and is directly followed by a Wide Slice, a frontal attack that deals a lot of damage.Aftershocks:Much like the boss before, this boss casts multiple electrically charged fields on the floor which take up most of the arena. Move out of them as quickly as possible, as it does a large amount of damage over time and will kill you eventually.Rockslide Rush:The boss will start a charge which can be seen by an AoE forming beneath him. This causes a high amount of damage if it isn't dodge rolled.Opalescent Impale:From time to time, the boss will start casting an interruptable attack, which, if not interrupted, will kill the one that got targeted by it. Just interrupt this immediately.Duplicate Wall:A wall of transparent duplicates will spawn and march through the room with a Rockslide Rush attack. Try not to get caught by it, otherwise they will cause a moderate amount of damage and throw you off your feet.Adds:The Realmshapers can heal the boss if you aren't careful and interrupt. These should be killed immediately! There will also be Relic Fiends which are more annoying than harmful, but should also be killed because otherwise they can be very overwhelming.There will also be another round of Duplicates which will cast Blade Tempest. Blade Tempest is a whirlwind 360° attack around the duplicates in which you don't want to get caught up because it deals a high amount of damage.
Hardmode Mechanics
Secret Bosses
The secret bosses in the Red Petal Dungeon will give bonuses to the players, which will be showcased here. In itself, these bosses aren't really challenging, but you only have limited space available, which can lead to some accidents. In order to get to the secret bosses, you need to unlock them by finding blue runes on the ground and standing on them. There's 3 for each boss, so that not the entire group needs to find one.

Activation Rune

Upon activating the mechanism, a portal to Goriseli Moraburo will spawn, a pocket dimension in Oblivion.
Wraith of Crows
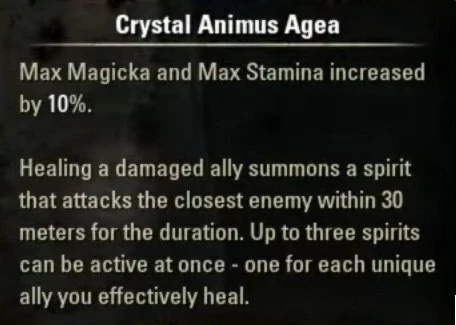
This one might be a bit tricky to find if you aren't looking for it specifically. In order to find this secret boss you need to go into the houses in the beginning of the dungeon to find the runes. And in order to fight against the Wraith of Crows, a player needs to activate the Crystal Animus. As soon as they do, various oblivion creatures will spawn, trying to kill the player. After a while, the Wraith of Crows will spawn and is pretty easily defeated. As soon as it dies the group will get this buff: Max Magicka and Max Stamina increased by 10%. Healing a damaged all summons a spirit that attacks the closest enemy within 30 meters for the duration. Up to three spirits can be active at once - one for each unique ally you effectively heal.
Watch this Youtube Video Timestamp to find the runes.
Spider Daedra
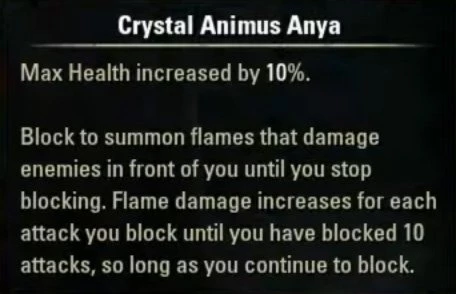
In order to fight against the Spider Daedra, a player needs to activate the Crystal Animus Anya. As soon as they do, various Oblivion creatures will spawn, trying to kill the player. As soon as they are dead, the Spider Daedra will spawn and is pretty easily defeated. As soon as she dies the group will get this buff: Max Health increased by 10%. Block to summon flames that damage enemies in front of you until you stop blocking. Flame damage increases for each attack you block until you have blocked 10 attacks, so long as you continue to block.
Watch this Youtube Video Timestamp to find the runes.
Grievous Twilight
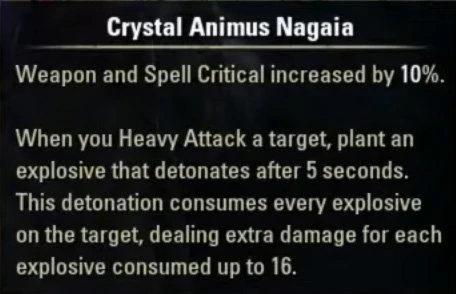
In order to fight against the Grievous Twilight, a player needs to activate the Crystal Animus Nagaia. As soon as they do, various Oblivion creatures will spawn, trying to kill the player. As soon as they are dead, the Grievous Twilight will spawn and is pretty easily defeated. As soon as he dies the group will get this buff: Weapon and Spell Critical increased by 10%. When you Heavy Attack a target, plant an explosive that detonates after 5 seconds. This detonation consumes every explosive on the target, dealing extra damage for each explosive consumed up to 16.
Watch this Youtube Video Timestamp to find the runes.
Video Gameplay
Full walkthrough of the veteran Red Petal Bastion dungeon. This was recorded on the PTS and the group went in there the first time.
Next up you can also watch a full solo dungeon run with a Magicka Sorcerer on normal mode.