Western Skyrim - ESO
To access this zone you must own the Greymoor DLC.
Zones within Western Skyrim:
Zones within Western Skyrim:
- Blackreach: Greymoor Caverns (Zone)
- Castle Thorn (Dungeon)
- Kyne's Aegis (Trial)
Sets in Western Skyrim
5 sets
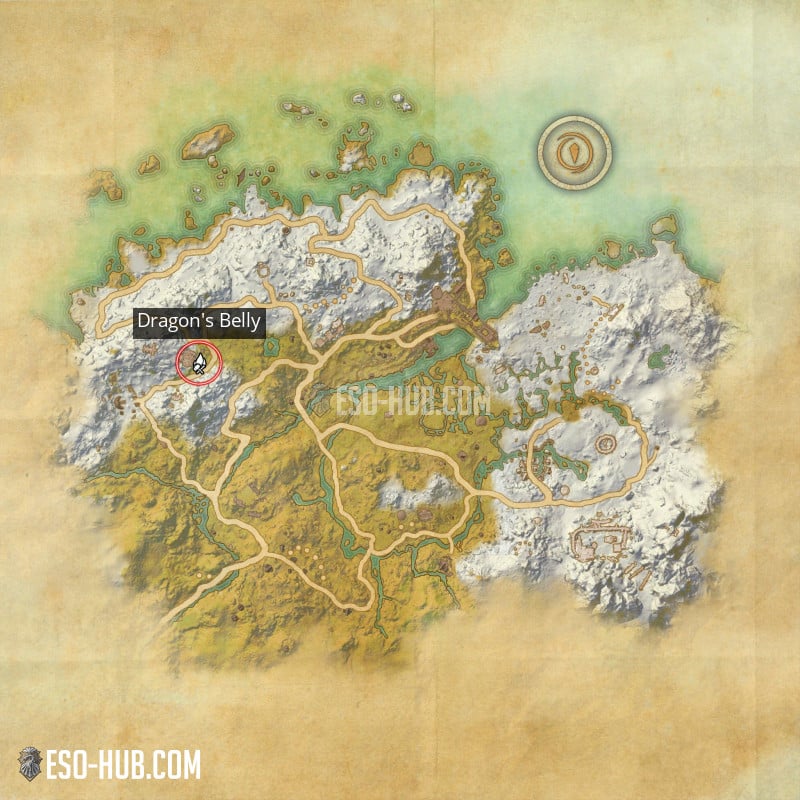
Craftable
Level 50 - CP 160
(2 items) Adds 129 Weapon and Spell Damage
(3 items) Adds 129 Stamina Recovery
(4 items) Adds 129 Stamina Recovery
(5 items) Increase your damage done to Bleeding enemies by 225. Dealing non-Bleed damage to Bleeding enemies generates a stack of Dragon's Appetite for 5 seconds, up to once per half second. After 10 stacks you consume Dragon's Appetite and heal for 4415 Health. The heal effect scales off the higher of your Max Magicka or Stamina.
Overland
Level 50 - CP 160
(2 items) Adds 129 Magicka Recovery
(3 items) Adds 129 Stamina Recovery
(4 items) Adds 129 Health Recovery
(5 items) Adds 337 Stamina and Magicka Recovery while your Health is above 50%. Adds 1011 Health Recovery while your Health is 50% or less.
(3 items) Adds 129 Stamina Recovery
(4 items) Adds 129 Health Recovery
(5 items) Adds 337 Stamina and Magicka Recovery while your Health is above 50%. Adds 1011 Health Recovery while your Health is 50% or less.
Craftable
Level 50 - CP 160
(2 items) Adds 129 Weapon and Spell Damage
(3 items) Adds 1487 Offensive Penetration
(4 items) Adds 129 Weapon and Spell Damage
(5 items) When you deal damage to an enemy who is Off Balance, your Offensive Penetration is increased by 5312 for 10 seconds.
(3 items) Adds 1487 Offensive Penetration
(4 items) Adds 129 Weapon and Spell Damage
(5 items) When you deal damage to an enemy who is Off Balance, your Offensive Penetration is increased by 5312 for 10 seconds.
Overland
Level 50 - CP 160
(2 items) Adds 657 Critical Chance
(3 items) Adds 657 Critical Chance
(4 items) Adds 129 Weapon and Spell Damage
(5 items) Dealing Critical Damage inflicts Hunter's Venom on your enemy for 10 seconds, dealing 714 Poison Damage to your target and enemies within 6 meters of them every 2 seconds. This effect can occur once every 15 seconds and scales off the higher of your Weapon or Spell Damage.
Overland
Level 50 - CP 160
(2 items) Adds 129 Magicka Recovery
(3 items) Adds 1096 Maximum Magicka
(4 items) Adds 1096 Maximum Magicka
(5 items) While in combat, casting abilities that leave an effect on the ground will create a circle of healing frost for 10 seconds. You and your group members restore 1126 Health every 2 seconds while inside the circle. This effect can occur once every 10 seconds and scales off the higher of your Max Magicka or Stamina.
Leads in Western Skyrim
Lead
Location:
Bear Monster in Blackreach. Also spawns on top of a dresser on the top floor of the Antiquarian Circle Building, you have to examine the Curios Coin Collection (Requirement: You MUST have done all green/blue/purple “freebie” leads in ALL zones before you can loot it!)
Bear Monster in Blackreach. Also spawns on top of a dresser on the top floor of the Antiquarian Circle Building, you have to examine the Curios Coin Collection (Requirement: You MUST have done all green/blue/purple “freebie” leads in ALL zones before you can loot it!)
Lead
Furniture: Antique Map of Western Skyrim
Location:
Found at the Inn (Requires Pathfinder Achievement)
Location:
Found at the Inn (Requires Pathfinder Achievement)
Lead
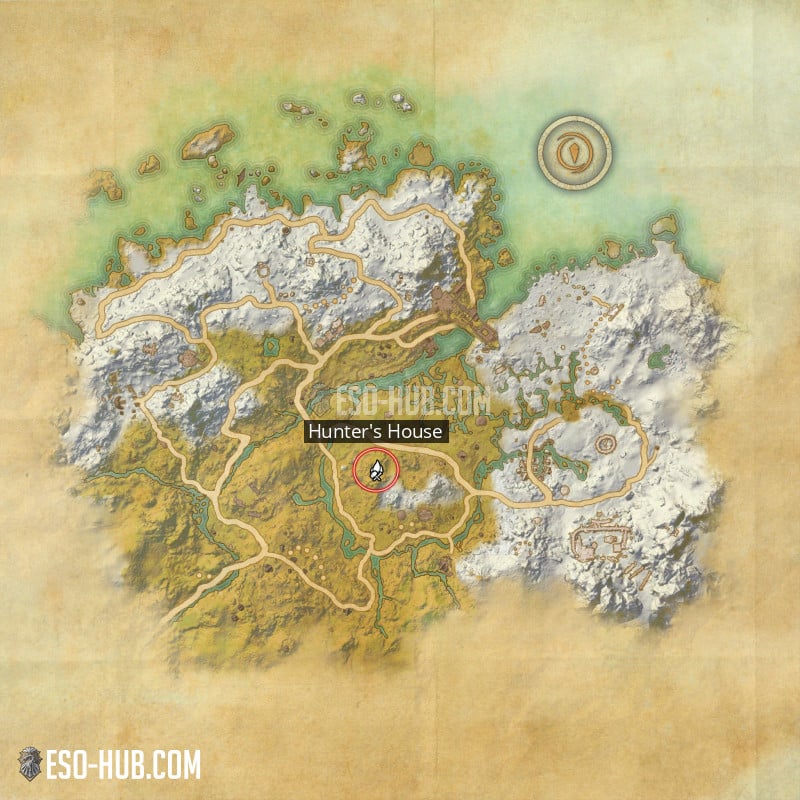
Armor set: Huntsman's Warmask
Location:
Hodrek's Hunting Grounds - Western Skyrim World Boss
View on map
Location:
Hodrek's Hunting Grounds - Western Skyrim World Boss
View on map
Lead
Location:
Antiquities tutorial quest in Solitude
Antiquities tutorial quest in Solitude
Lead
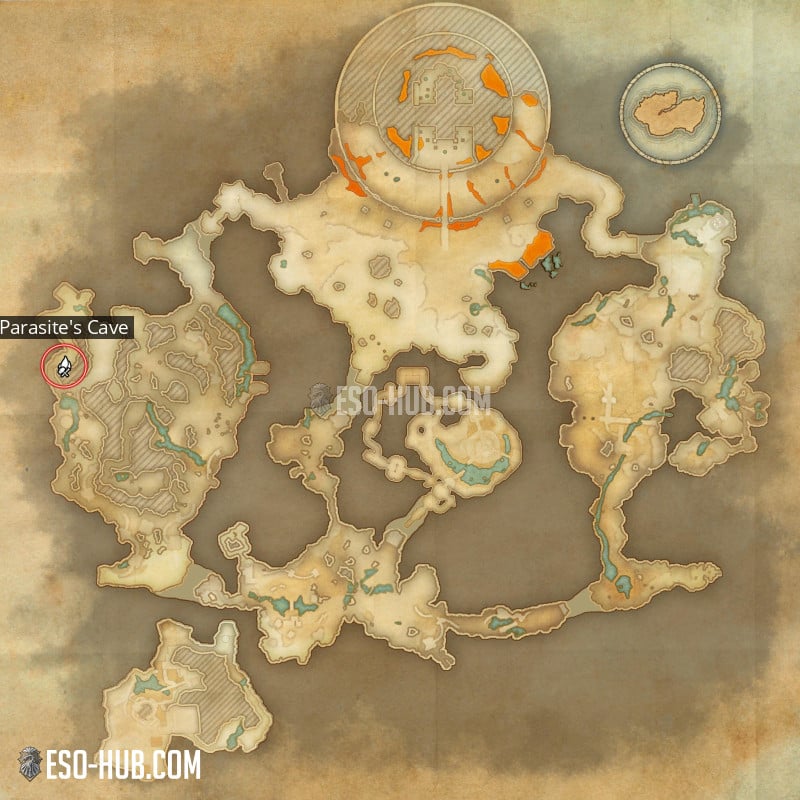
Armor set: Snow Treaders
Location:
Blackmaw Boss in Labyrinthian (Most likely drops from any boss in that dungeon)
View on map
Location:
Blackmaw Boss in Labyrinthian (Most likely drops from any boss in that dungeon)
View on map
Lead
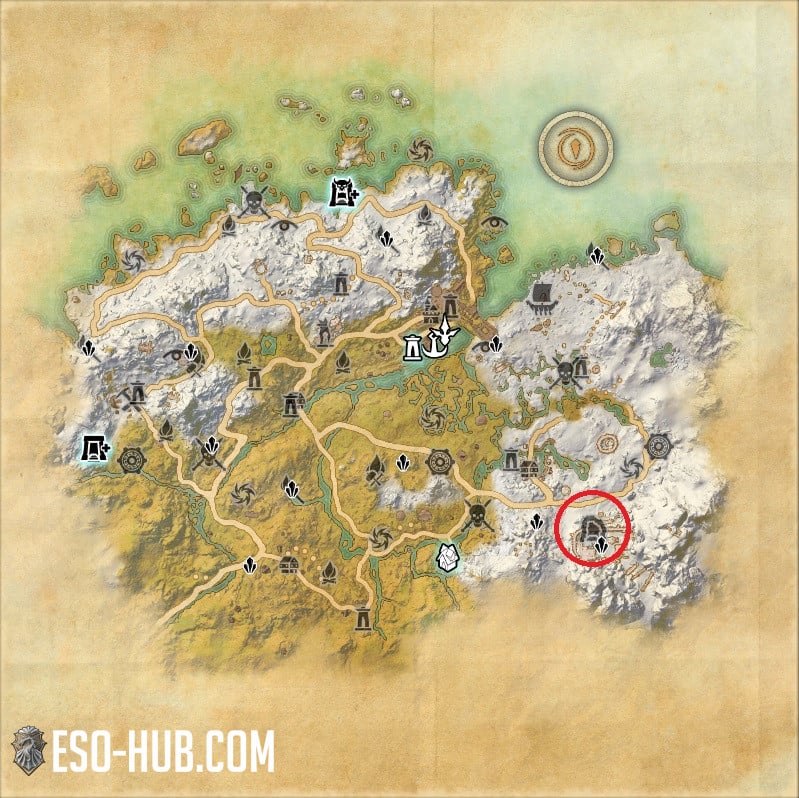
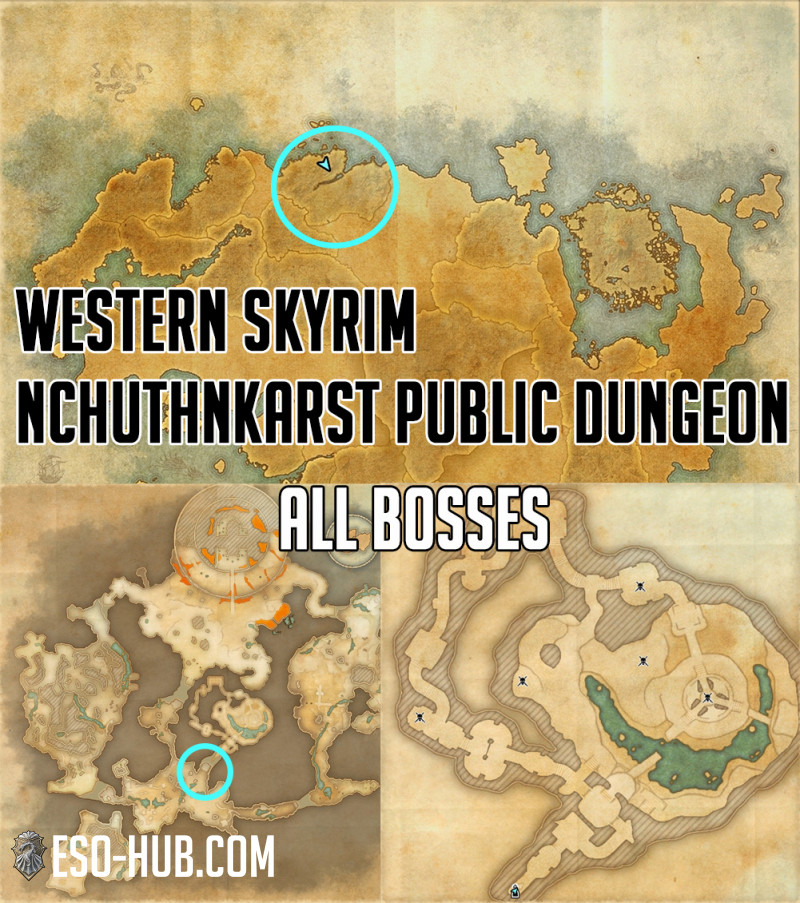
Collectible: Ebon Dwarven Wolf
Location:
Bosses in Nchuthnkarst (Excluding Group Event Boss)
View on map
Location:
Bosses in Nchuthnkarst (Excluding Group Event Boss)
View on map
Lead
Location:
Reward for excavating Silvered Nord Drinking Horn
Reward for excavating Silvered Nord Drinking Horn
Lead
Furniture: Seat of the Snow Prince
Location:
World Bosses, Safe Box, Nchuthnkarst Boss, Pentarch Khorb during the Main quest in Kagnthamz
Location:
World Bosses, Safe Box, Nchuthnkarst Boss, Pentarch Khorb during the Main quest in Kagnthamz
Lead
Location:
Reward for excavating Nord Scrimshaw Pendant
Reward for excavating Nord Scrimshaw Pendant
Lead
Collectible: Ysgramor's Chosen Body Markings
Location:
At the end of Morthal Barrow from the Danger in the Holds Main Quest
Location:
At the end of Morthal Barrow from the Danger in the Holds Main Quest
Houses in Western Skyrim
Notable Home
Many lived within Solitude's coveted Proudspire Manor over the years, but its last owner vanished, leaving its spacious living quarters empty—and available. Shelter yourself from the cold within this multi-room landmark in the heart of Solitude.
Gold Purchase Requires:
"Skyrim Grand Adventurer" Achievement
view on map
Notable Home
Before working arcane miracles on Eyevea and the College of Winterhold, the great mage Shalidor experimented with pocket realms of Oblivion. One domain, his Shrouded Realm, features Nord-style towers on arboreal terrain that floats in a wondrous sky.
view on map
Staple Home
Whether visiting the Bards College, seeking an audience at the Blue Palace, or looking to imbibe the best Nord mead around, take advantage of convenient living in the midst of Solitude with this room inside the Lonely Troll.
Room is too small for Dueling.
Purchase Requires:
"Room to Spare" House Quest Completion
view on map
Notable Home
Tucked away in scenic Hjaalmarch, this rustic gallery contains plenty of space to display all manner of antiquities. A gorgeous waterfall provides water to a private pond, creating a perfect setting for scholarly gatherings.
view on map
Notable Home
Towering architecture, views to die (or kill) for, and a secret passage number among the many features of this striking Blackreach edifice, which stands within easy reach of Greymoor Keep.
view on map
Notable Home
This Frozen Coast location features a Dwarven passage that leads past two deep alcoves and out to a frozen lake set amid the natural beauty of Skyrim. Hidden away beyond the lake, an ice cave awaits those seeking further respite from the world.
view on map
Western Skyrim map
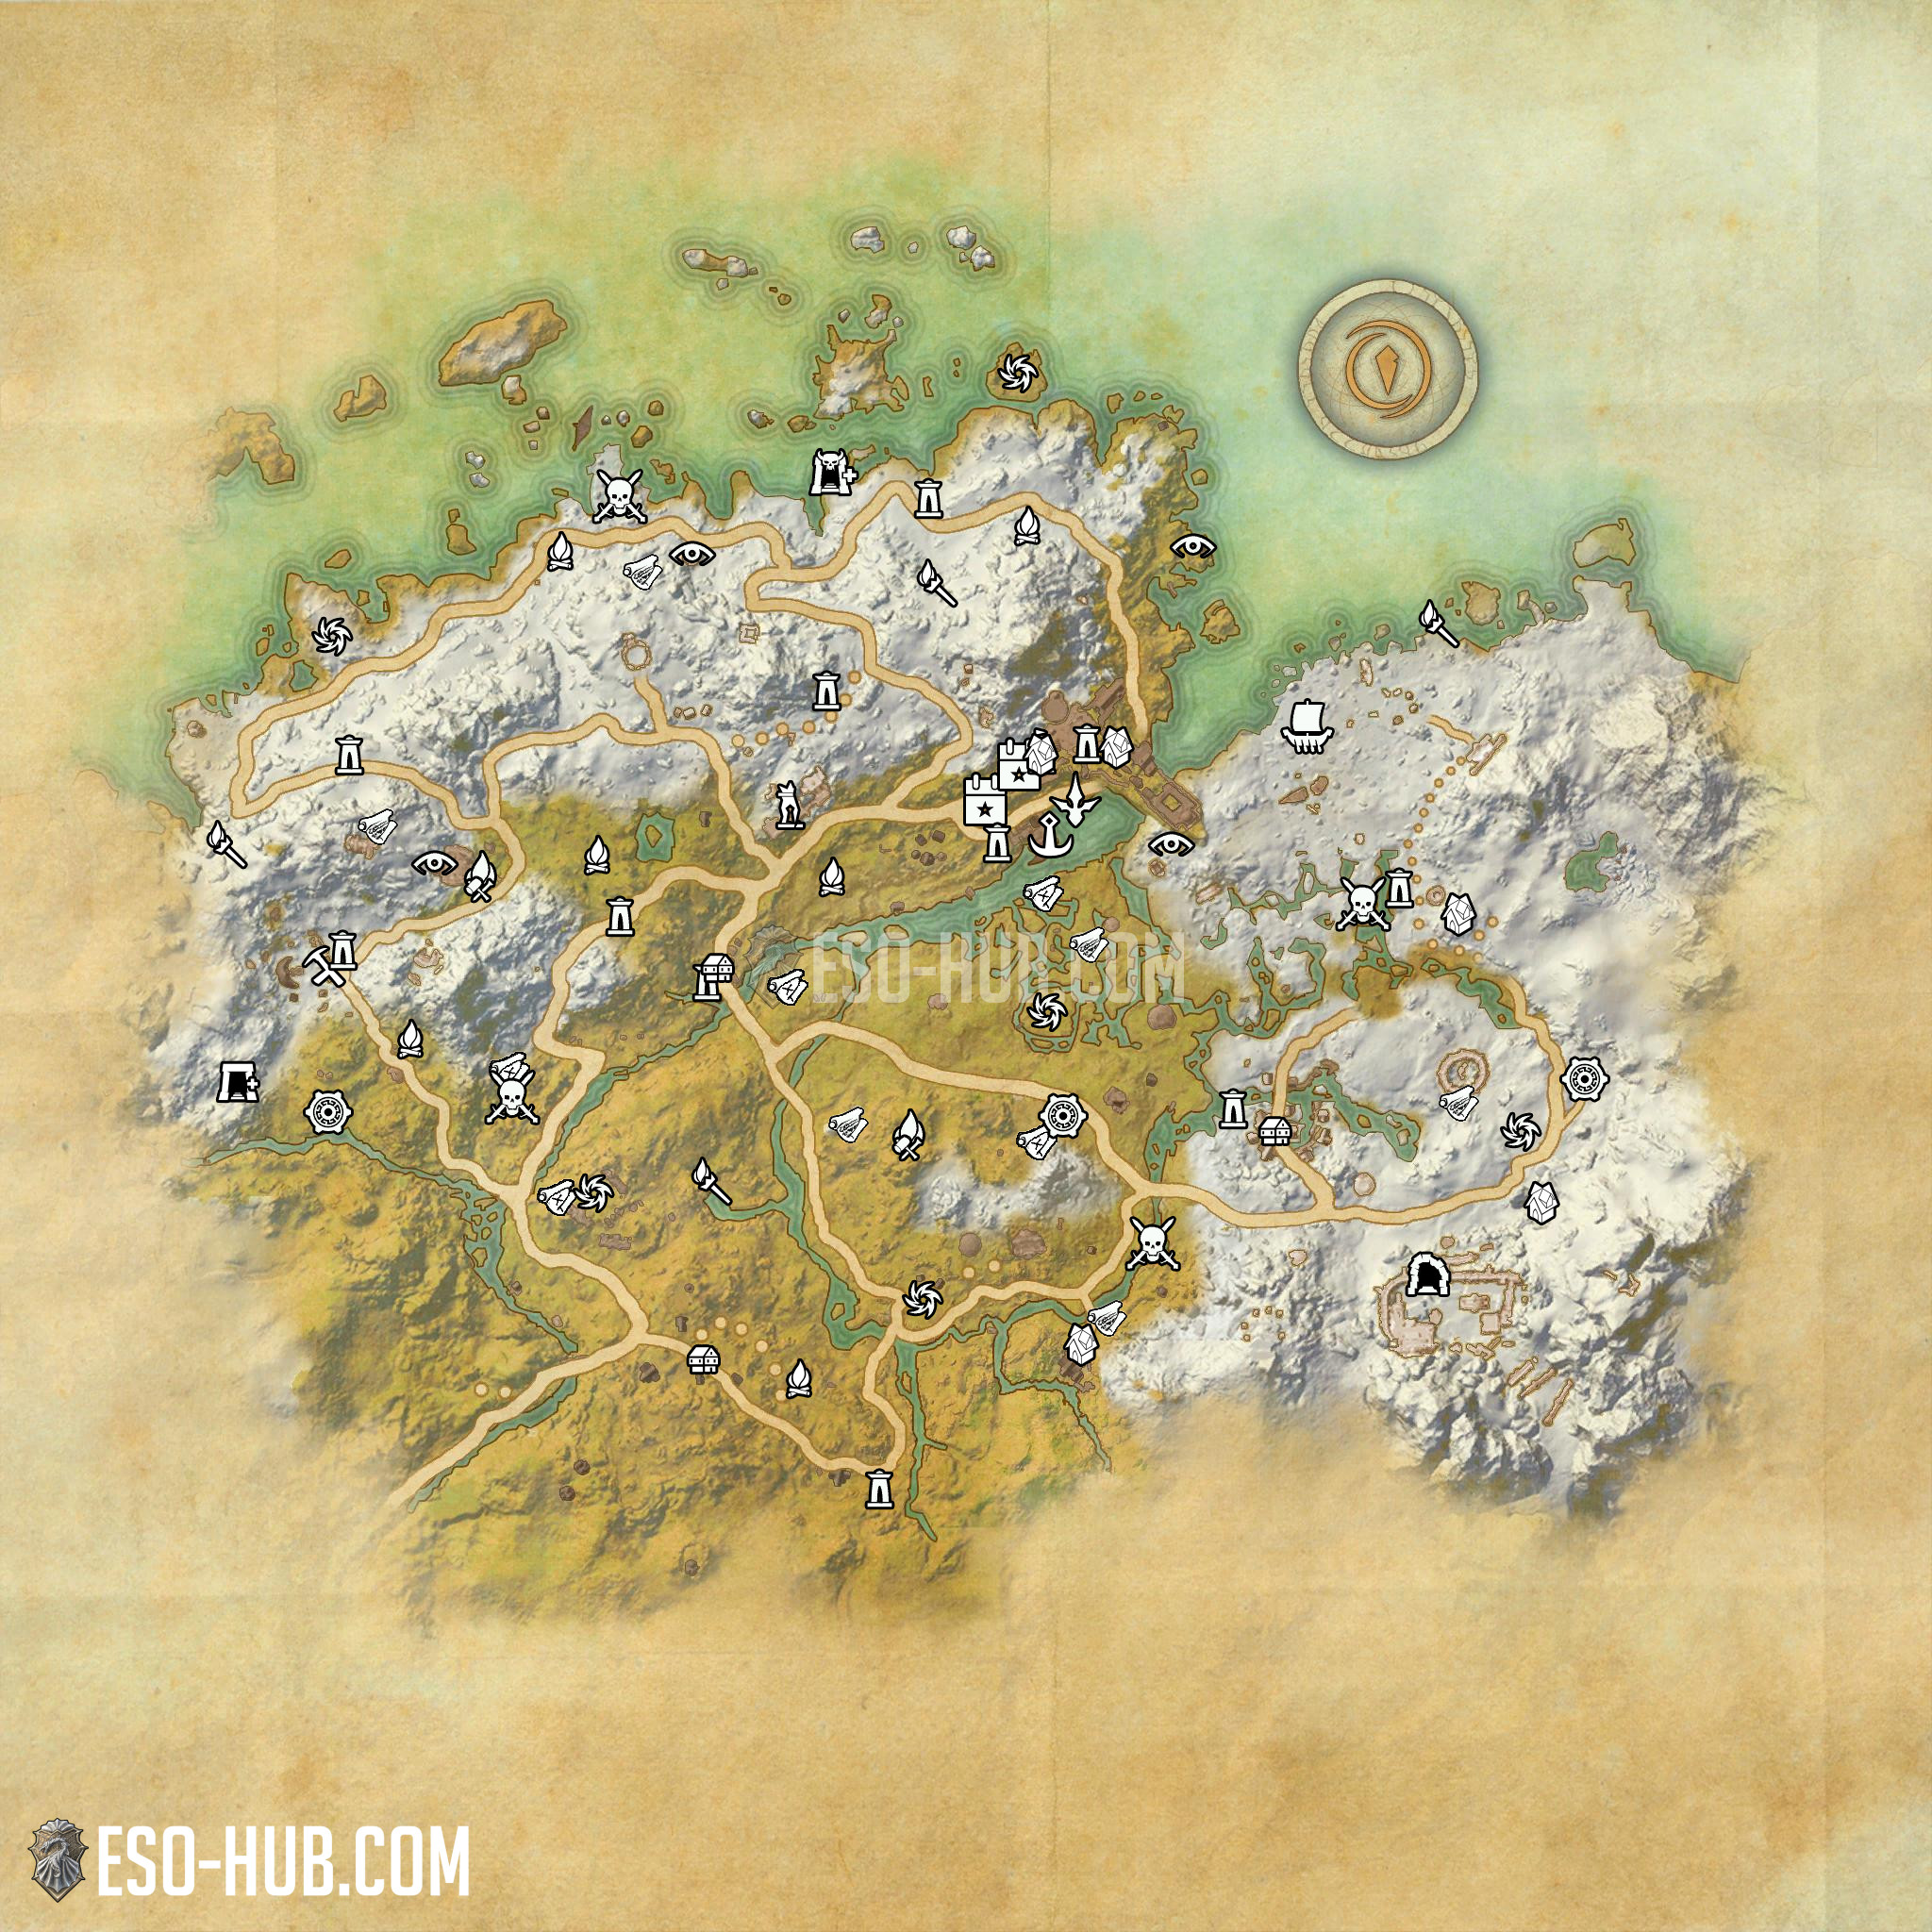
Crafting locations in Western Skyrim
Guides
General
ESO Chronological Timeline Guide - Best Way to Play the Story and Avoid Spoilers
Every ESO Chapter, DLC and Prologue quest in the correct story order. Follow this chronological path to experience the full Elder Scrolls Online narrative without spoilers.
4 months ago

Beginner
How to join the Fighters Guild in ESO
Welcome to the How to join the Fighters Guild in ESO guide. Here you can find all information you need to know in order to be able to join the Fighters Guild!
2 years ago
Beginner
How to join the Mages Guild in ESO
Welcome to the How to join the Mages Guild in ESO guide. Here you can find all information you need to know in order to be able to join the Mages Guild!
1 year ago
General
Zone Dailies List for ESO - Zone Daily Elder Scrolls Online
Welcome to the Zone Dailies Guide for ESO. You can find a list of every zone that has dailies available here.
2 years ago