Discord Bot
 ESO Server Status
 AlcastHQ
 First Descendant





U50 Rampaging Slayer
Welcome to @KaiRosenthal's Solo Stamina Dragonknight Build titled "Rampaging Slayer"!
This is my attempt on making a solo build using weapons, skills, and armors that I like but also make sense for my character, while also making him able to survive on his own. Contained in this guide section, you'll find what and how my reasoning and justification for the build, and also some alternatives that I hope is easy and simple enough to follow along.
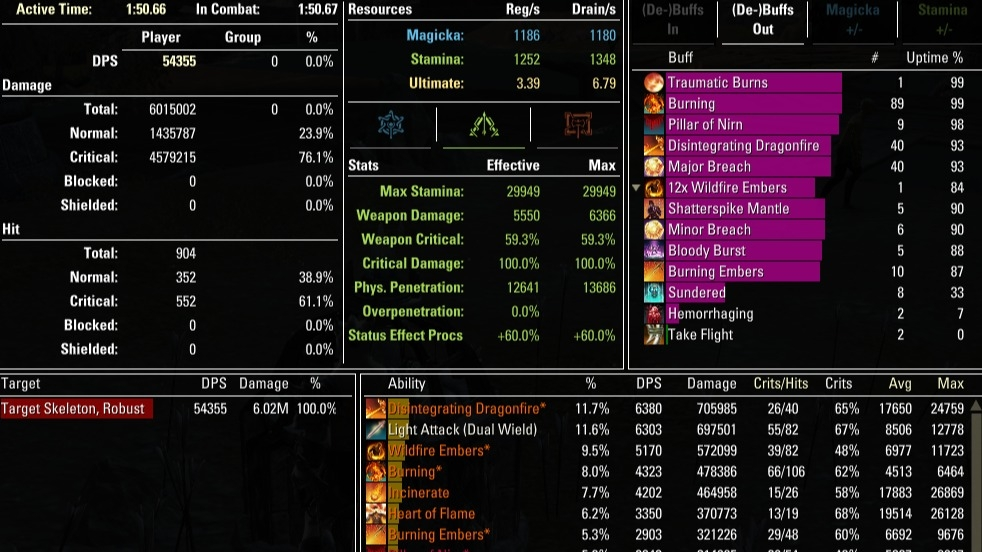
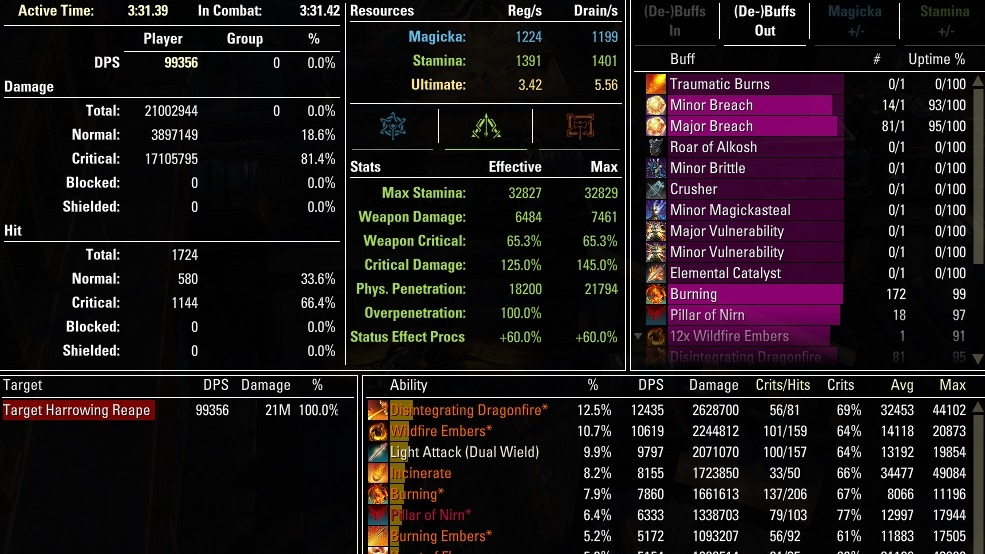
Quick Note: The parses in the Screenshots section are using  Bewitched Sugar Skulls. The 21m parse is using
  Markyn Ring of Majesty because it assumes you're doing group content. Expect lower parse DPS if you're using other food.
Gears
> Why 1/6/0 instead of 1/5/1 or 0/7/0?
We want as much damage as possible, and medium armor's passives accommodates that. I also use one light armor piece just so we reach a tiny bit under 100% penetration cap for instanced content.
> Why  Pillar of Nirn and
  Order's Wrath?
Pillar of Nirn is a nice proc set to have for its damage and its a fitting visual for DK imo. Meanwhile Order's Wrath is the best set that boosts our damage, which is very easy to obtain as it's a crafted set.
For the back bar bow, you can go with  Perfected Thunderous Volley, although I personally didn't find any differences in terms of damage compared to just using Order's Wrath.
> Why  Slimecraw?
One piece of Slimecraw gives us more critical chance, which will increase our damage output. You can use other sets that gives critical chance like  Iceheart and
  Zaan if you want.
> Why  Ring of the Pale Order?
This mythic ring gives us huge survivability by allowing our damages to also heal us. If you for some reason want to do group content with this build, I suggest you use Markyn Ring of Majesty or  Death Dealer's Fete instead. It won't perform insanely great compared to dedicated DD builds, but it should work decent enough, as demonstrated in the Screenshots section.
Skill Selections
Here are my skill selections, their brief effect and use, as well as which slots they occupy:
Front Bar
 Soul Burst: AoE DoT that gives Minor Breach. Occasionally will give Hemorrhaging, dealing more DoT.
 Disintegrating Dragonfire: Our spammable that gives Major Breach.
 Deadly Cloak: AoE DoT with Major Evasion.
 Burning Embers: DoT and HoT.
 Heart of Flame: Delayed AoE attack that restores all of our resources.
 Take Flight: Cheap ult for our sustain, stuns enemies in an AoE, and gives a +10% damage buff for 15s.
Back Bar
 Resolving Vigor: Burst heal that also gives Minor Resolve.
 Shatterspike Mantle: Major Resolve and DoT. If you need more survivability, you can use
  Earthshield Mantle instead, which gives shield instead of DoT.
 Endless Hail: AoE DoT.
 Incinerate: AoE DoT that gives Major Savagery and Major Prophecy by just being slotted.
 Igneous Weapons: Major Brutality and Major Sorcery. We use this morph because the other morph requires constant application, which drains our already small pool of magicka.
 Standard of Might: An ultimate that buffs you by increasing damage dealt, reducing your damage taken, and debuffs enemies by increasing their damage taken.
Class Mastery
I took  Inexorable Descent and
  Wildfire Embers for damage increase.
Consumables
For the food, these are your complete options:
 Longfin Pasty with Melon Sauce or Crown Fortifying Meal for max resource increase, resulting in more damage. Bewitched Sugar Skulls is the upgraded version.
- Orzorga's Tripe Trifle Pocket if you need more stamina sustain.
 Dubious Camoran Throne is the first upgrade, and
  Artaeum Takeaway Broth is the best version.
For the potions, personally I only use the Crown Potions for osogof situations, but if you need more survivability or just want to have a safer time doing your thing, I recommend the Essence of Health listed on the Consumables section.
Opener
Note: ">>" means "bar swap and use this skill next" and ">>>" means "proceed to your spammable".
Igneous Weapons
>> Heart of Flame
>> Endless Hail > Incinerate > Shatterspike Mantle > Resolving Vigor > Standard of Might
>> Deadly Cloak > Burning Embers > Heart of Flame > Soul Burst >>>
Use Take Flight whenever it's ready. Reactivate the skills as they tick down, including Heart of Flame.
Additional Information
You've made it this far, thank you! Here are some more reading for you, for more bits of extra knowledge:
- If you're playing on harder difficulty or just enjoy a larger HP pool, you can do a 32/32 split on HP and Stamina. It'll reduce your DPS, but will make you survive better.
- We use the Lover mundus for all instanced solo content to increase our penetration. You can use the Thief instead if you just want to run around in the overland for more damage.
Thank you!
I hope you'll enjoy the build as much as I do. If you have any questions or suggestions, feel free to let me know at @KaiRosenthal in-game.
See you around!