


I consistently parse around 135k–145k on most bosses in veteran dungeons with this build.
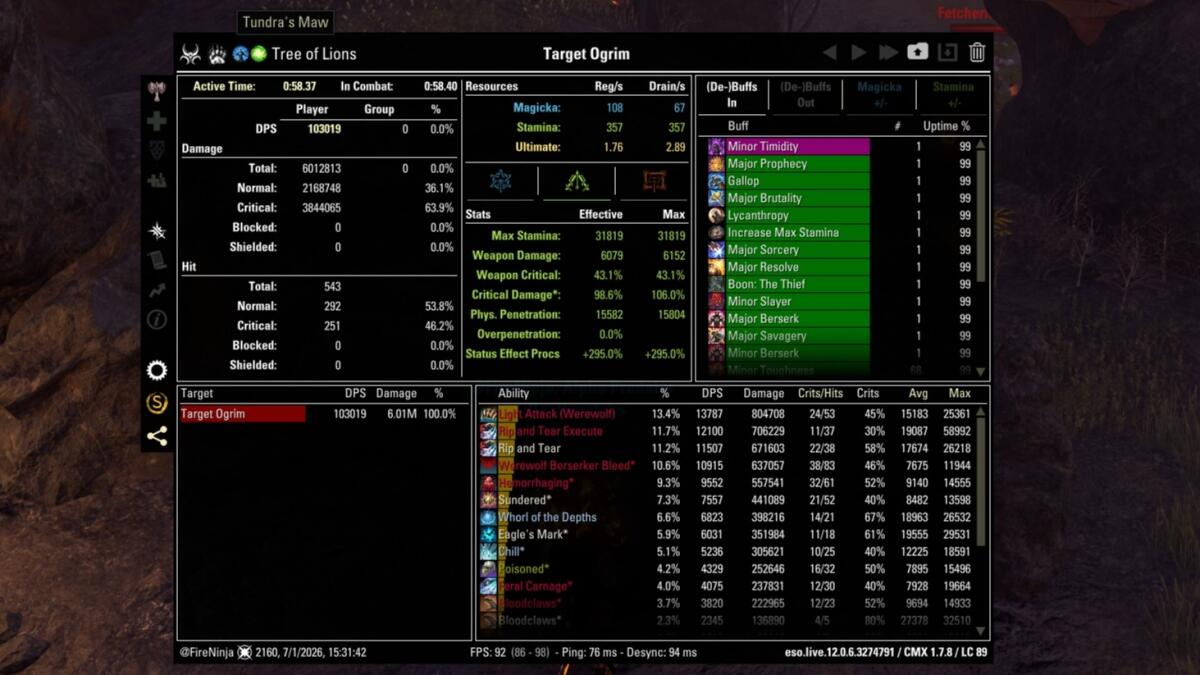
For reference, the 103k 6 mil parse was done after the Shattered Signet nerf, so the build is still performing very well even post-nerf.
There are a few things that make it work so well.
Warden has very strong Chilled damage, so pairing a Frost enchant with the Whorl proc adds a lot of damage over time. Then, when you combine that with Tundra’s Way and Major Brittle increasing damage taken by 20%, it takes the build to a whole new level.
On most single-target fights, you can get around 55–60% Major Brittle uptime with a Charged Frost enchant and the Whorl proc.
Wild Adaptation also does a lot of work, and Shattered Signet helps you hit the cap for status effects and weapon damage.
Follow the gear, CP, and food setup shown. Use bi-stat food for real content and green stamina food for parsing.
The rotation is pretty simple, but the burst timing matters a lot.
Prebuff by attacking the dummy until you have Werewolf ultimate ready, then reset the dummy.
Before starting the parse, roar away from the dummy for the synergy and 2 stacks of Blood Hunger. You can have 4 stacks total, but you’ll get the other 2 when you start the parse.
Then run up to the dummy and cast:
Hircine’s Rage > Werewolf Ultimate > Ferocious Roar
Your roar sets the target Off Balance, which gives you extra damage from the Exploiter CP. At the same time, you’re in your ultimate, doing more damage, you have 4 stacks of Blood Hunger, and Whorl is about to proc.
That is how you front-load your damage and get a really strong parse.
Do not ult until you can set the target Off Balance first. If you can wait until both Off Balance and the Whorl proc are ready, that is ideal.
The priority system is:
Feral Carnage > Blood Claws > Hircine’s Rage > Ferocious Roar every 20 seconds > Rampage when Fury is full > Bloody Gnash
Try to line up Rampage with Off Balance whenever possible. Even better, line up Rampage with Off Balance from Ferocious Roar and the initial Whorl proc. When all three line up together, you get a huge burst damage window.
Outside of that, the rotation is very straightforward:
Keep Feral Carnage and Blood Claws up, keep Hircine’s Rage active, roar every 20 seconds for Off Balance, use Rampage when Fury is full, and use Bloody Gnash as your main spammable/filler when nothing else needs to be refreshed.
If the target is down to around 2–3% health, do not recast anything. Just keep spamming Bloody Gnash until the target dies.
Armor and weapon notes:
The setup I’ve shown is for parsing 6 mil solo. For actual content, your armor weights should depend on the content you’re doing and how much penetration you need.
At the high end, if you need a lot of penetration, you can run 6 light and 1 medium. If you do not need much penetration, then run 6 medium and 1 light instead.
If your group composition is somewhere in the middle, figure out how much penetration you still need and adjust your light/medium pieces to match that.
Since Aerie’s Cry can be either medium or light, you can take advantage of that flexibility if you have Whorl or Ansuul weapons.
Also, since werewolves do not benefit from weapon passives, you do not need daggers or any specific weapon type. Whatever weapons you already have will work. That leads me too...
Whorl vs Ansuul:
You can also use Ansuul’s Torment just fine in content where the Whorl proc is not going to be as effective.
For arena trash, I actually love running Ansuul’s. You are moving around a lot, enemies die fast, and Whorl is usually only affecting one trash mob at a time. In that kind of content, Ansuul’s often feels much better.
You also get frequent interrupts in arenas, which gives you even more damage from Ansuul’s.
I have parsed the poison boss in vMA multiple times while mostly ignoring mechanics, just keeping my back to the wall to avoid the poison flowers. In fights like that, where the boss is staying mostly in place, Whorl can still perform very well. But for mobile fights, trash waves, and arena-style content, Ansuul’s is a very strong option.