 English
 Deutsch
 Русский
 Español


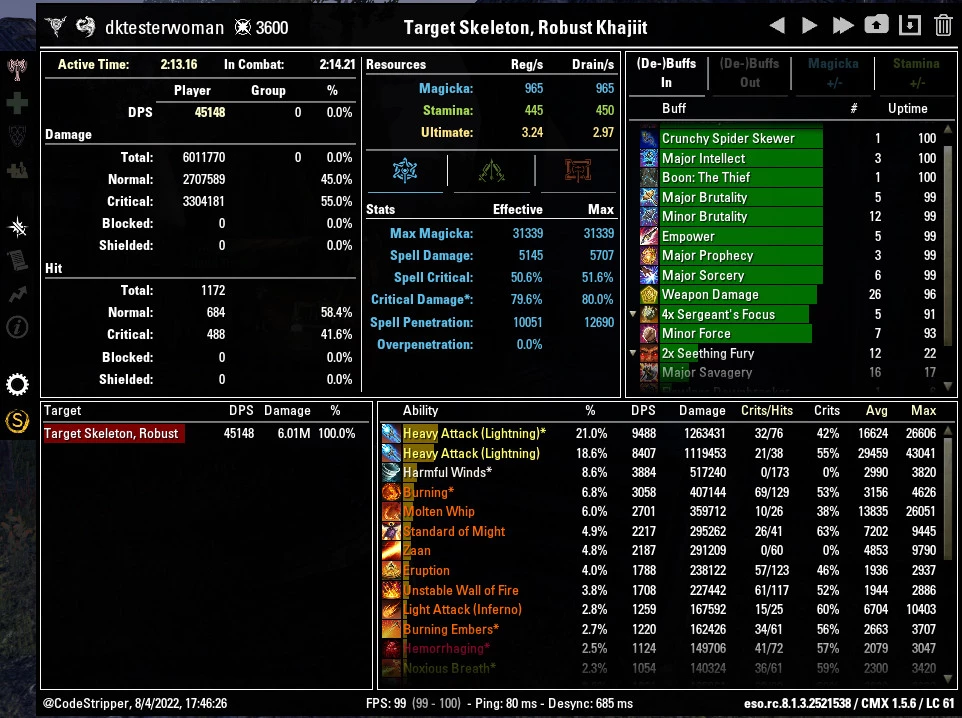
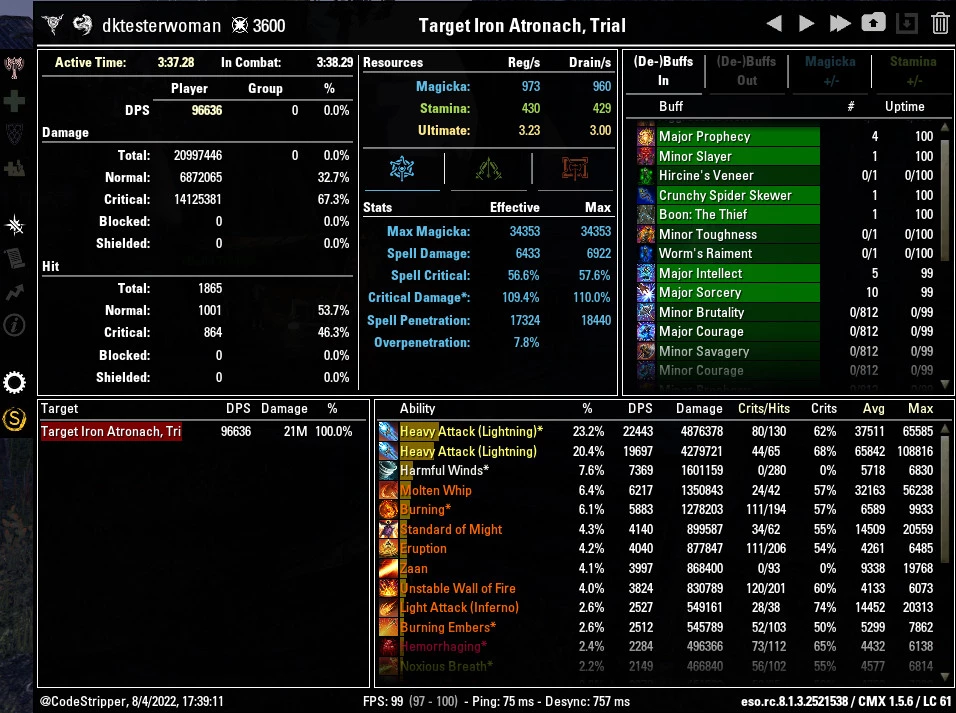
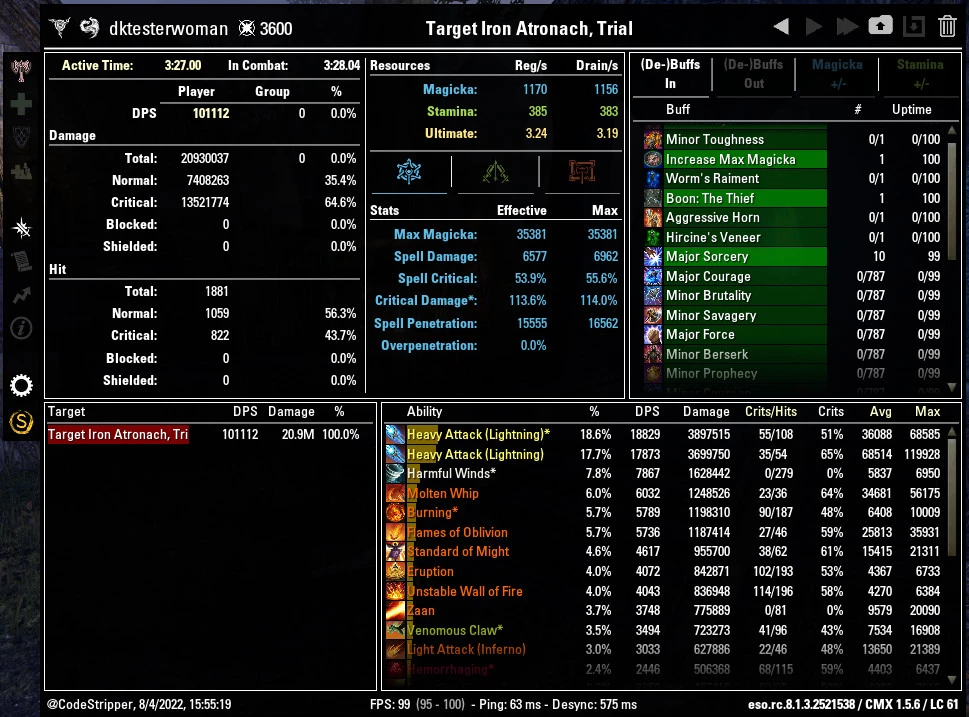
Hello and welcome to my magicka DK HA Build!
We have 2 setups for this build. One is meant to handle solo and dungeon content, the other is for trials.
The solo / dungeon build will have more penetration by going with light on the monster helmet and more healing with Cauterize and Burning Embers.
The Trial build sacrifices all of this but also still has a self-heal slotted on the back-bar for those “Oh Crap” moments.
The rotation is fairly standard:
Pre-Buff:
Flames of Oblivion / Cauterize
Molten Armaments
Starting the Rotation:
Potion
Standard of Might
Unstable Wall of Fire
Eruption
Swap Bars
Engulfing Flames / Noxious Breath
Barbed Trap
Venomous Claw / Burning Embers
Heavy Attack
Molten Whip
After this:
Keep up DoTs when they go down on both bars
Always get back to your front bar for heavy attacks as quickly as possible
When re-applying DoTs on the front bar, try to time them so you can weave heavy attacks to cast them instead of light attacks.
Standard of Might Ultimate when available
(If the boss is low on health, using flawless dawnbreaker instead is a good option if you don't have banner ready)
Make sure you are weaving light attacks on the back-bar and animation cancelling with barswap to spend as little time on the back bar as you can.
If you have any questions, feel free to let me know!